16 DIY Halloween Decor Ideas That Look Expensive
DIY Halloween decor does not have to look like a school craft table. The ideas below use black paint, paper, cheesecloth, thrifted frames and battery lights to build a moody, grown-up look in a rental or a small home. Most projects cost under $15, take under an hour, and come off the wall without a mark. If you want your place ready before October 31, start with the front door and the mantel, then add one idea a night. Here are 16 easy DIY Halloween decor ideas worth your weekend.
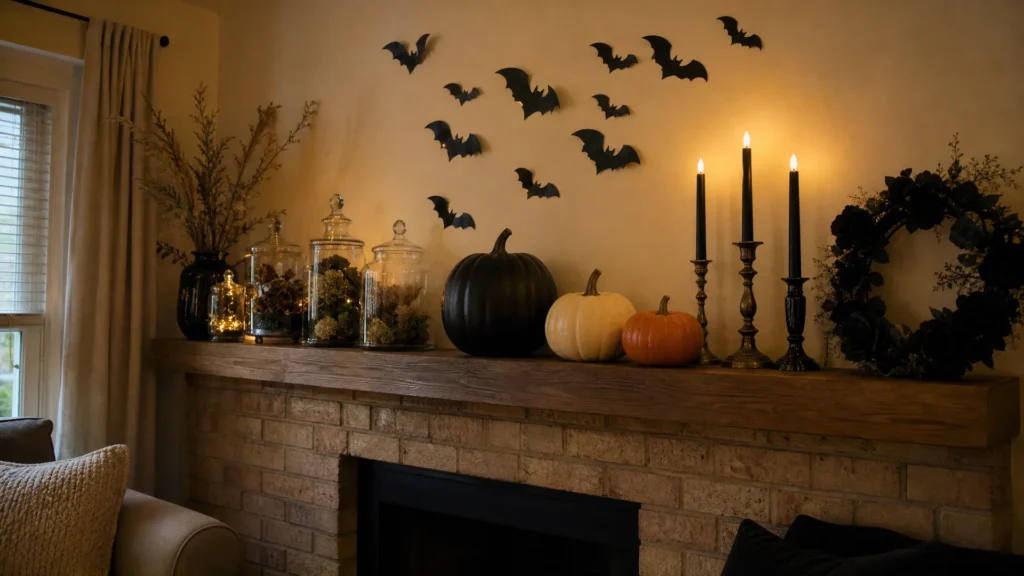
Quick answer: For the best DIY Halloween decor on a budget, pick one color scheme (black, cream and one orange accent), then make three things: a door wreath, a mantel display and a window or wall piece. Use battery lights and removable hooks instead of flames and nails. Most of these projects cost $5 to $20 each.
Key Takeaways
- Stick to black, cream and one orange accent so mixed DIY pieces look like one set.
- Use battery candles and LED string lights near paper, cheesecloth and fabric. Never use open flames next to them.
- Removable hooks, painter’s tape and poster putty keep rental walls and doors damage-free.
- Thrift stores and dollar stores supply the frames, jars, candlesticks and pumpkins; paint and paper do the rest.
How to Decorate for Halloween in a Rental
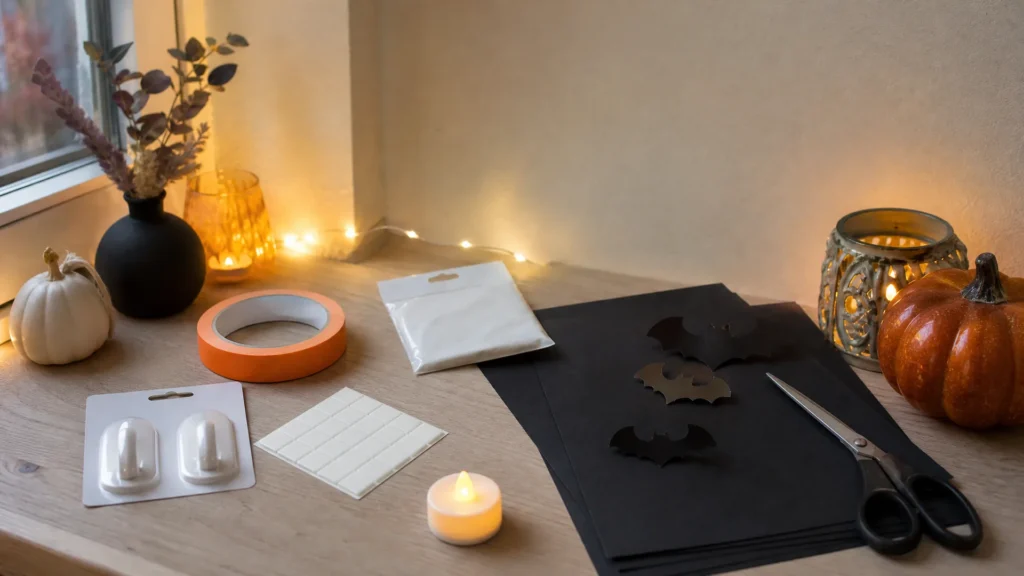
A few ground rules keep the look polished and keep your deposit safe. Follow these six steps before you start any project.
- Pick a three-color palette. Black, warm cream and one orange or deep-purple accent make handmade pieces look intentional. Everything below follows this palette.
- Choose your hanging method first. Check whether your wall or door finish takes removable hooks or painter’s tape. Test one hidden spot for 24 hours before you decorate a whole wall. Command’s hook guidance explains weight limits and surfaces.
- Go low-light and warm. Use battery candles and LED string lights in warm white. They glow like real flames and are safe next to paper and fabric.
- Decorate three zones, not the whole home. The front door, one mantel or shelf, and one window or wall is enough for a full look.
- Mix handmade with thrifted. Paint a thrifted frame or candlestick black, and it looks custom. Plain paper and cheesecloth do the rest.
- Plan the teardown. Keep each project’s supplies in one box so you can pack everything away in ten minutes on November 1. For the next season, see our fall home decor ideas.
For more low-cost project ideas you can use all year, see these DIY home decor ideas that look expensive.
Front Door and Entryway DIY Halloween Decor
Your entry sets the tone, and it is the cheapest place to start. These three projects work for apartment doors and small hallways.
1. Black Floral Wreath
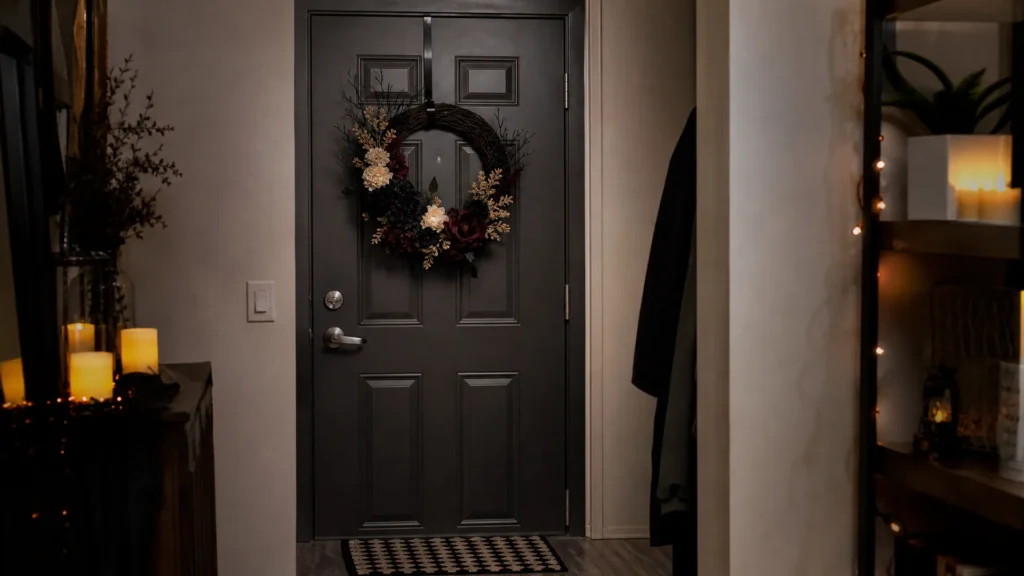
A black floral wreath looks designed, not crafted. For a holiday version, our guide to layering garlands on a grapevine wreath shows the same loose, designed look in greenery. Spray-paint a grapevine or foam wreath form matte black, then glue on faux flowers and sprigs in black, deep burgundy and cream. A 14 to 16 inch wreath uses about five stems and costs $10 to $20 with a dollar-store form. Add a few dried or faux branches for height. Hang it on an over-the-door hook or a removable adhesive hook rated above its weight. If your door finish rejects adhesive, loop ribbon over the top edge of the door instead.
Cheaper option: skip the form and glue the stems to a metal embroidery hoop or a paper plate ring cut from cardboard, which costs about $3.
2. Paper Bag Ghost Lanterns
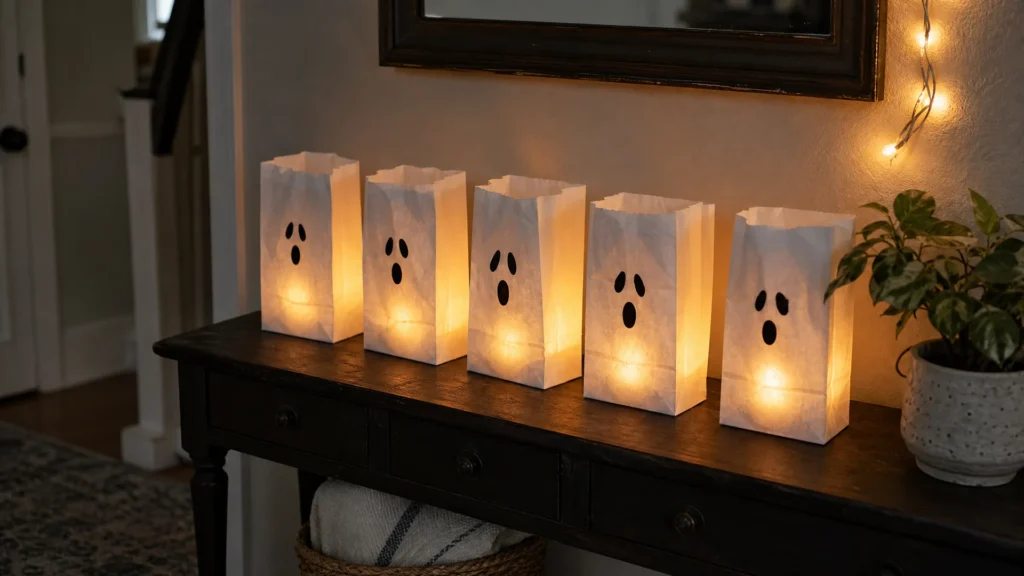
Brown paper bags become soft glowing ghosts in about ten minutes each. Draw a ghost face on a white lunch bag with a black marker, fold the top down once, and drop in a battery tea light. Set three to five along a shelf, windowsill or the floor beside your door. Each one costs under $1. Stay with battery lights; a paper bag and a real flame are a fire hazard. For a more elegant version, use white paper and punch out a small circle for each eye so the light shows through.
Renter-safe tip: set them on a tray so wax-free battery lights and paper never touch your floor or a rug.
3. Window Silhouettes
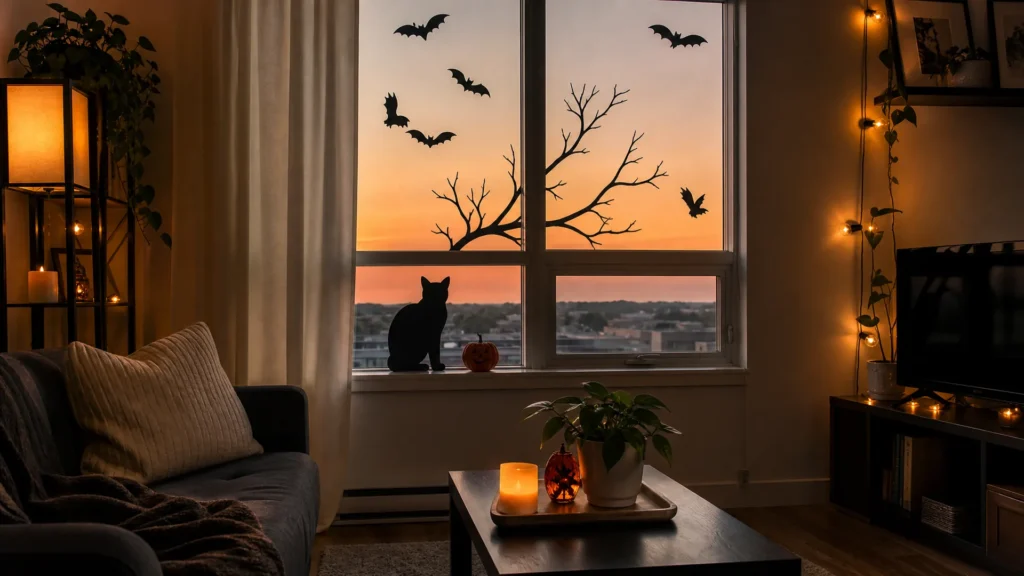
Black cardstock cut into bats, cats, branches or a haunted house reads as a stencil when light hits it from behind. Cut shapes 4 to 12 inches wide and stick them to the inside of the glass with painter’s tape rolled into small loops, or with removable window clings. A pack of 10 sheets of cardstock costs about $5 to $8. Group shapes on one pane instead of scattering them across every window. Peel them off in November and the glass is clean.
Cheaper option: cut shapes from the black paper that came in a delivery box or from old cereal-box cardboard painted black.
Mantel and Shelf DIY Halloween Decor
A mantel, bookshelf or console gives you a ready-made stage. Keep the height varied and the palette tight.
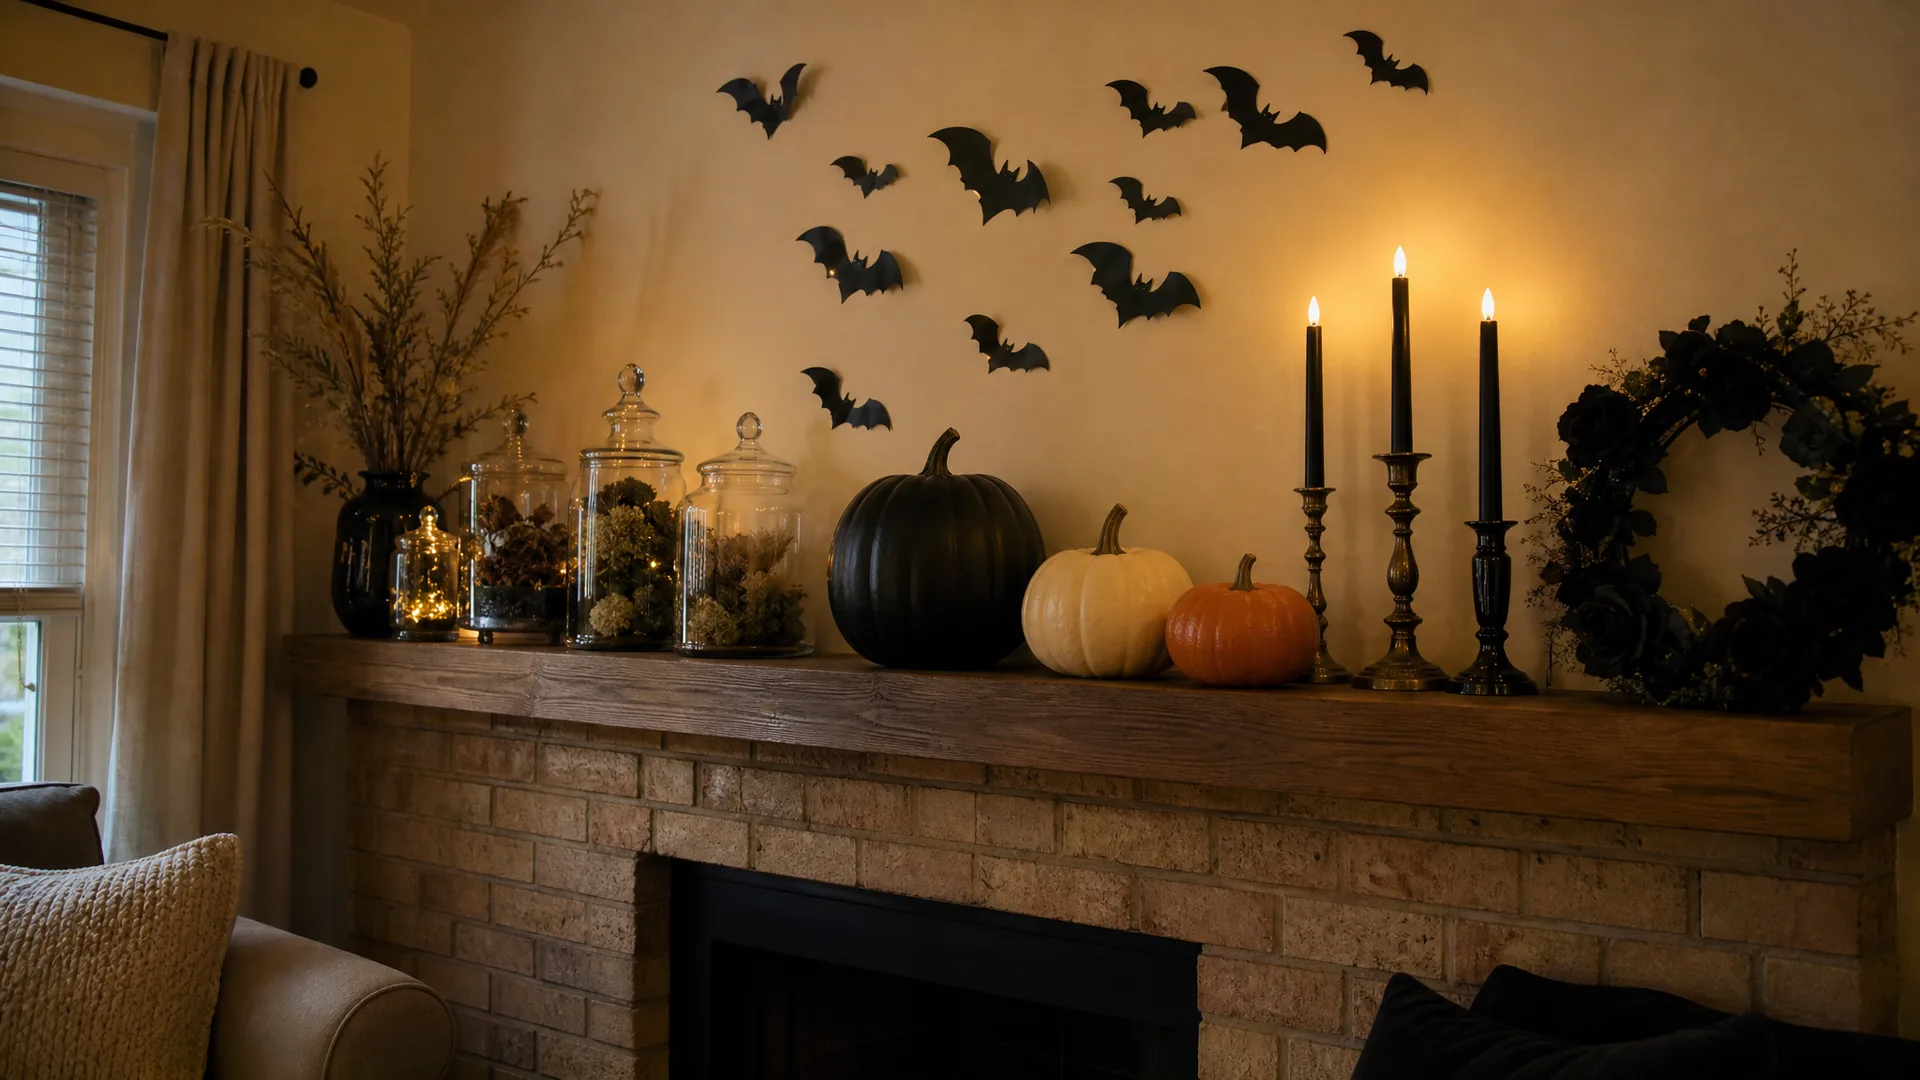
4. Apothecary Potion Jars
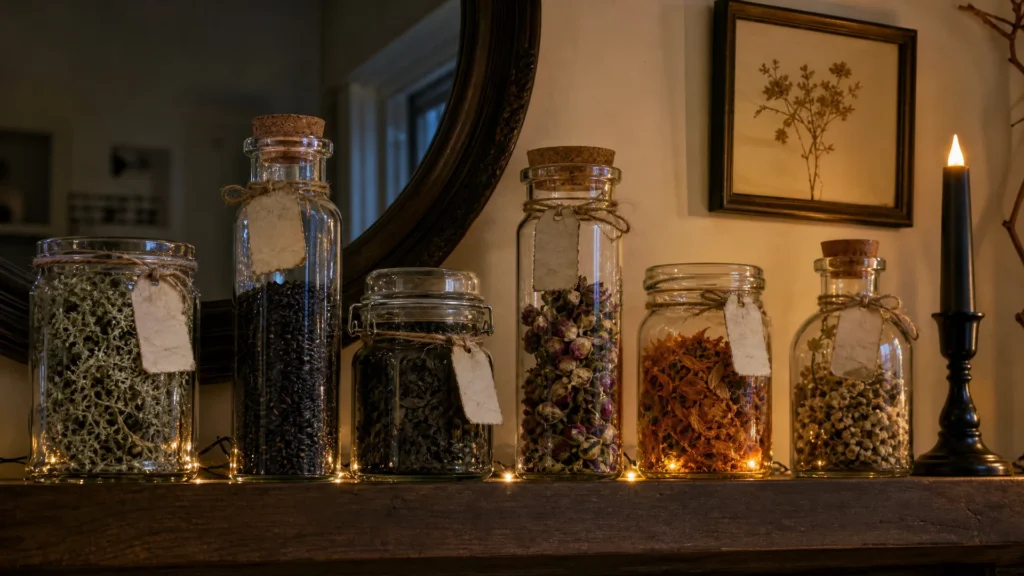
Old pasta-sauce jars, candle jars and thrifted glass bottles become an apothecary display. Soak off the labels, then fill each jar with something dark and textured: dried moss, black rice, tea leaves, faux spider webbing or dried flowers. Print small labels like “Raven Feather” or “Bat Wing” on cream paper, and tape them on. Group five to seven jars in odd numbers, with heights from 4 to 10 inches. The whole set costs $0 to $10 if you save jars through September. Use cork or lids to keep contents inside.
Renter-safe tip: set the jars on a tray or a thrifted cake stand so you can move the whole display in one lift and clean the shelf underneath.
5. No-Carve Painted Pumpkin Trio
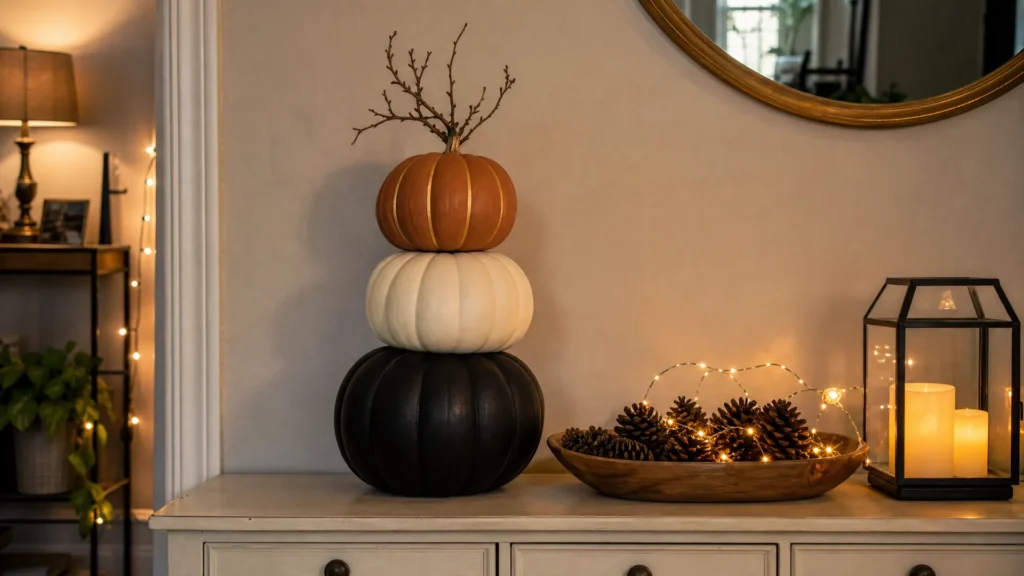
Real pumpkins rot in a week or two, but craft pumpkins last for years. Paint three foam or real pumpkins matte black, cream and a muted orange with acrylic craft paint. Stack them in graduated sizes, such as 4, 6 and 8 inches, and top the tallest with a dried branch for a stem. Paint a thin gold line along the ribs for an expensive look. Three small foam pumpkins cost $6 to $12, and one bottle of craft paint costs about $2. Painting a real pumpkin? Seal it with a clear spray and keep it out of direct sun.
Cheaper option: use the free paint samples or leftover wall paint from a past project in place of craft paint.
6. Cheesecloth Ghosts
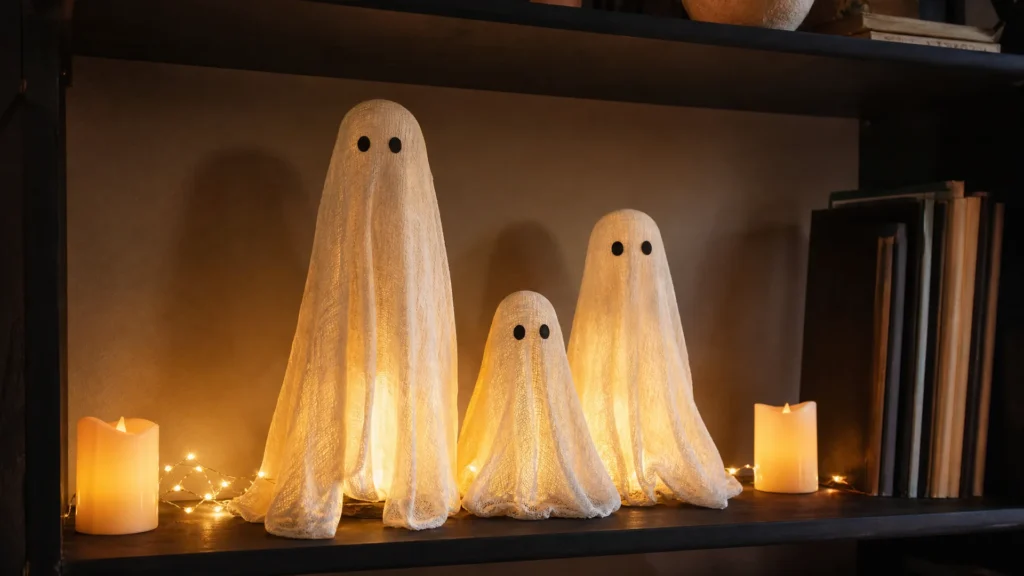
Cheesecloth ghosts look haunted, not cartoonish. Wrap a small bottle, a foam ball or a crumpled paper ball with cheesecloth, dip it in a mix of white glue and water, drape it over a jar, and let it dry overnight. Pull it off and you have a stiff, hollow ghost. Poke two small black dots for eyes with a marker. A yard of cheesecloth costs about $2 to $5 and makes three or four ghosts. Keep them 12 inches or more from any heat source, including bulbs.
Cheaper option: use a square of old white cotton or a gauze bandage roll if you do not have cheesecloth. Store them flat in a box and they last for years.
7. Black Taper Candle Display
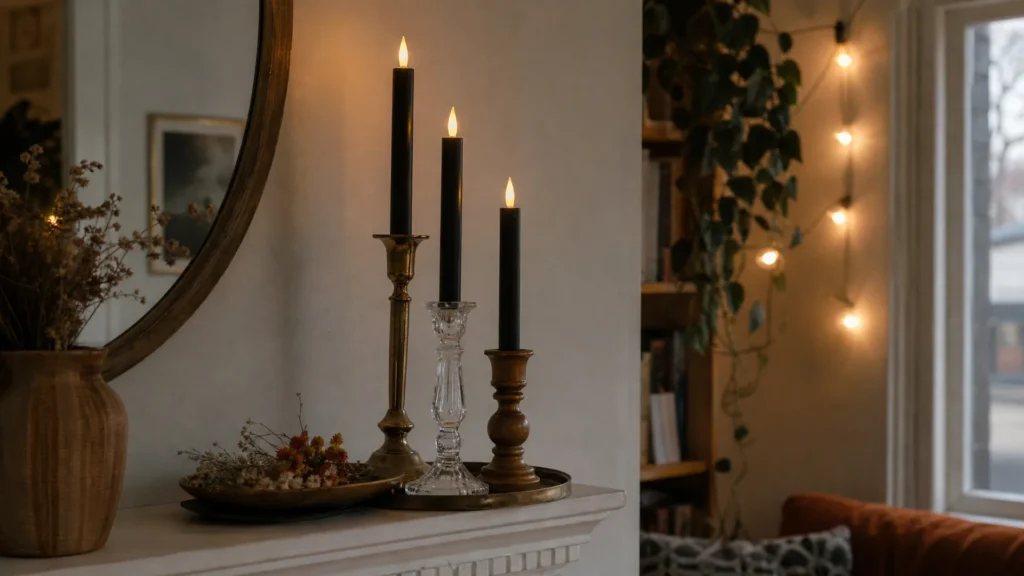
Black tapers in mismatched holders make the simplest elegant mantel. Use battery-operated LED tapers, sold in packs of two to six for about $8 to $15, for a flicker with no flame. Set them in thrifted candlesticks of different heights and group them on a tray or in a cluster of three. Add a dish of dried flowers or a few cheesecloth ghosts at the base. If you prefer real candles, keep them away from every paper or fabric piece and never leave them unattended.
Cheaper option: paint cardboard tubes black and drop a battery tea light in the top for a flameless taper that costs under $2.
Wall and Window DIY Halloween Decor
Walls are the easiest place to add drama without covering a surface. Every project here hangs with removable products.
8. Cardstock Bat Flock
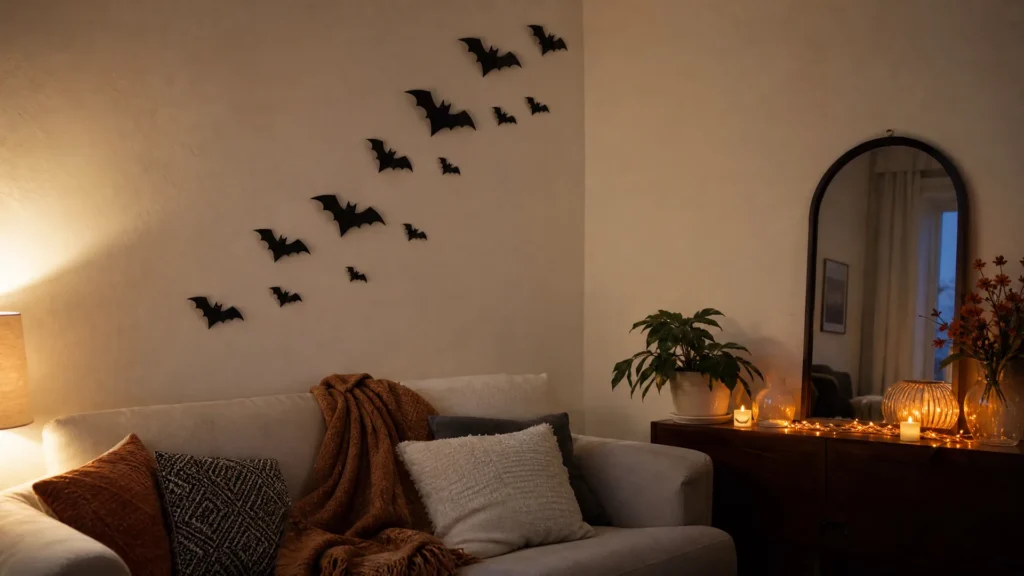
A flock of 12 to 20 black bats creates a graphic wall display. Cut bat shapes from black cardstock in three sizes, roughly 3, 5 and 7 inches wide, and fold the wings slightly so they lift off the wall. Attach each with a small piece of poster putty or a rolled painter’s tape loop. Climb the bats diagonally from a corner, or arrange them in a loose swirl over a sofa. Total cost is $3 to $6 for black cardstock. Peel off in November; test one bat on your paint first.
Renter-safe tip: poster putty on a flat painted wall is the gentlest option, and a rolled loop of painter’s tape works on most smooth finishes.
9. Haunted Portrait Gallery
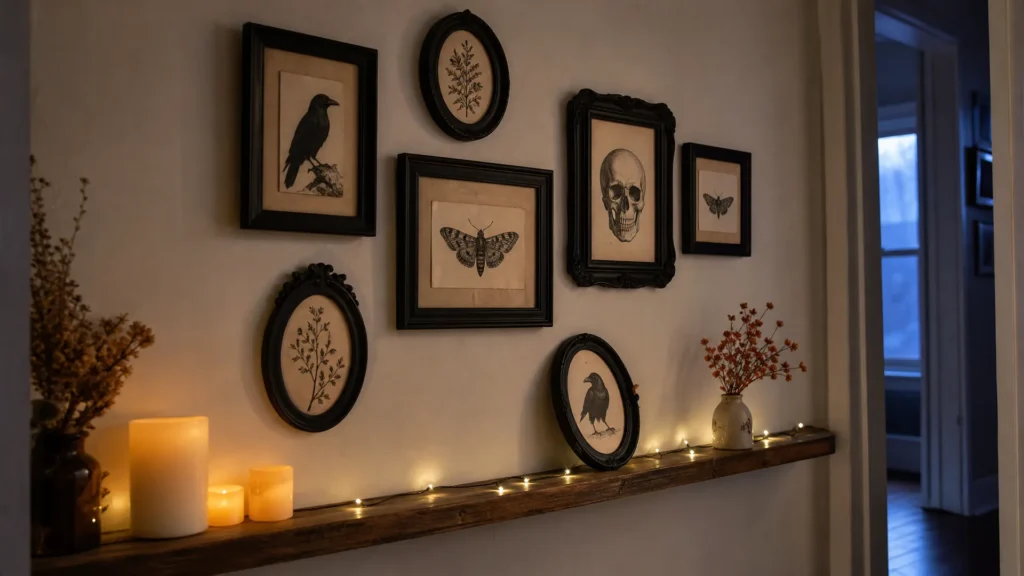
A gallery of spooky “portraits” turns thrift-store frames into the focal point of a hallway or stairwell. Print or draw vintage-style silhouettes, ravens, moths, skulls or botanical illustrations in black and white, and slide them into five to nine mismatched frames. Spray-paint every frame matte black to unify them. Frames cost $1 to $4 each at thrift stores, and printing costs pennies. Lean the frames on a ledge or shelf if you cannot make holes. For layout tips, see our wall decor ideas.
Cheaper option: print the artwork at home on plain paper, then tea-stain it so the color looks aged instead of flat white.
10. Cobweb Chandelier
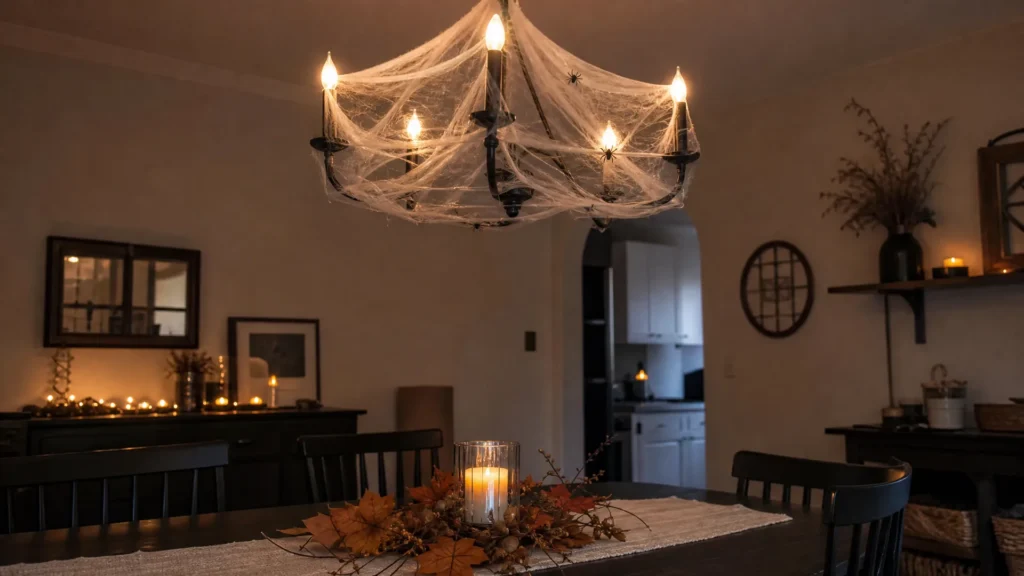
Stretch cobweb makes any light fixture, lamp or chandelier look abandoned in the best way. Pull the stretchy web thin until it is nearly see-through, drape it over the arms or shade, and tuck a few small black spiders on top. A bag of webbing costs $2 to $5. Use it on non-heat fixtures only, and keep it well away from any bulb that gets hot. LED bulbs stay cool; a standard hot bulb does not. If in doubt, drape the web on a hanging plant hook or curtain rod instead.
Renter-safe tip: stretch the web between two removable hooks across a corner of the ceiling if you cannot reach the light fixture safely.
Table and Dining DIY Halloween Decor
If you host or just want a dinner table that feels seasonal, these three ideas work for a dining room or a small kitchen table. See more table ideas in our dining room decor guide.
11. Moody Branch Centerpiece
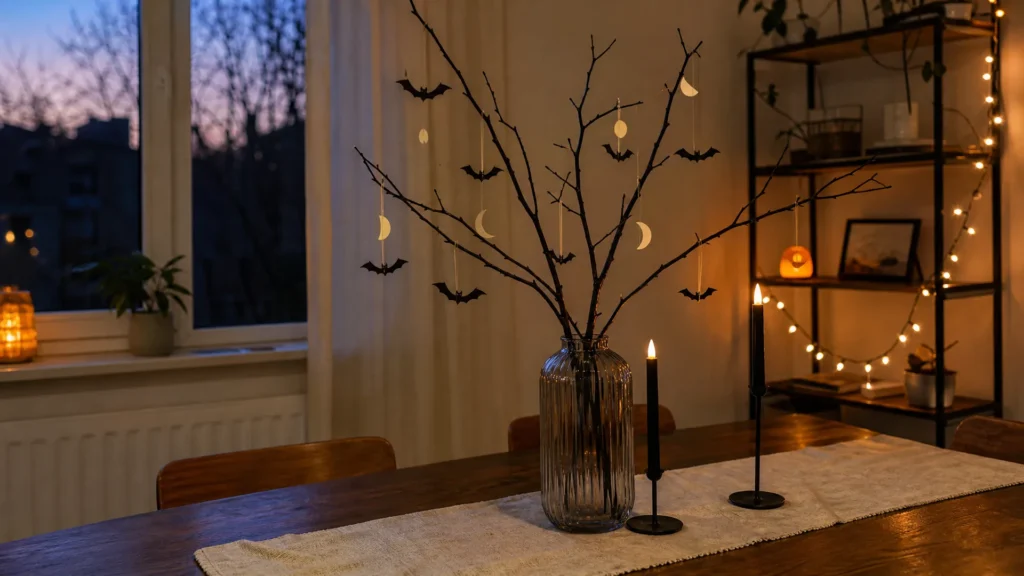
Branches in a tall vase create height without costing a dollar. Cut or gather three to five bare branches, about 24 to 36 inches long, and spray them black or leave them natural. Stand them in a heavy vase or jar weighted with pebbles. Hang paper bats, small feathers or tiny paper moons from the twigs with thread. If you buy faux branches, expect to pay about $5 to $12 for a bundle. Keep the display narrow, under 12 inches wide, so guests can see across the table.
Cheaper option: gather branches after a windy day from your yard or a park, where local rules allow, and weigh the vase with pebbles or dried beans.
12. Painted Thrift-Store Candlesticks
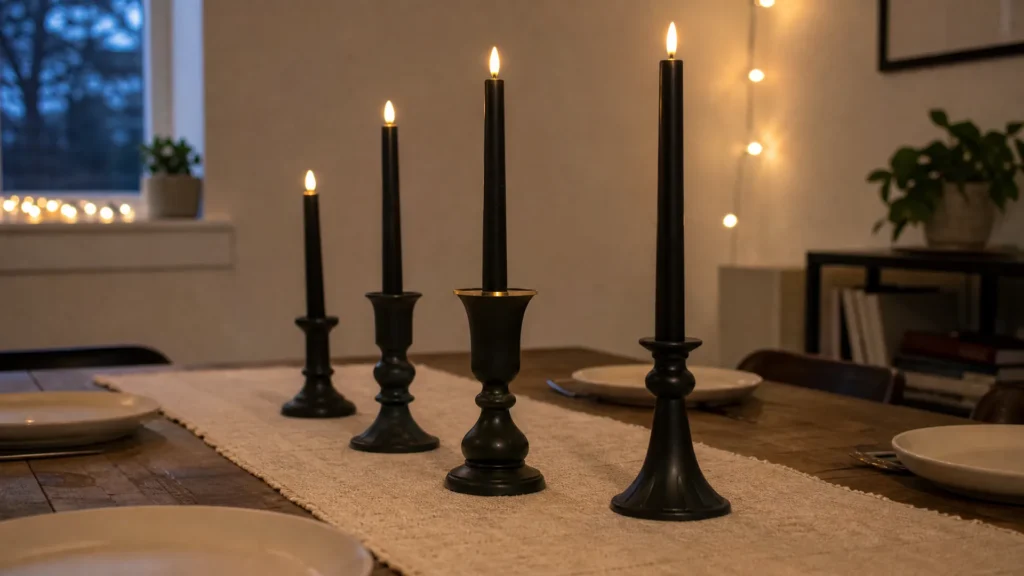
Thrifted brass, wood and glass candlesticks look matching after a coat of matte black paint. Clean them, scuff the surface lightly, prime if the finish is shiny, then spray two thin coats of black. Dry time is about an hour per coat. Pairs cost $2 to $6 each at thrift stores. Set them in a row down the table with battery tapers. Tap a metallic gold paint pen over the rim for a quick accent. For a softer look, paint one set deep green and one set black.
Renter-safe tip: paint outdoors or in a ventilated space, and set the finished pieces on a felt pad so they do not scratch your table.
13. Potion Bar Labels
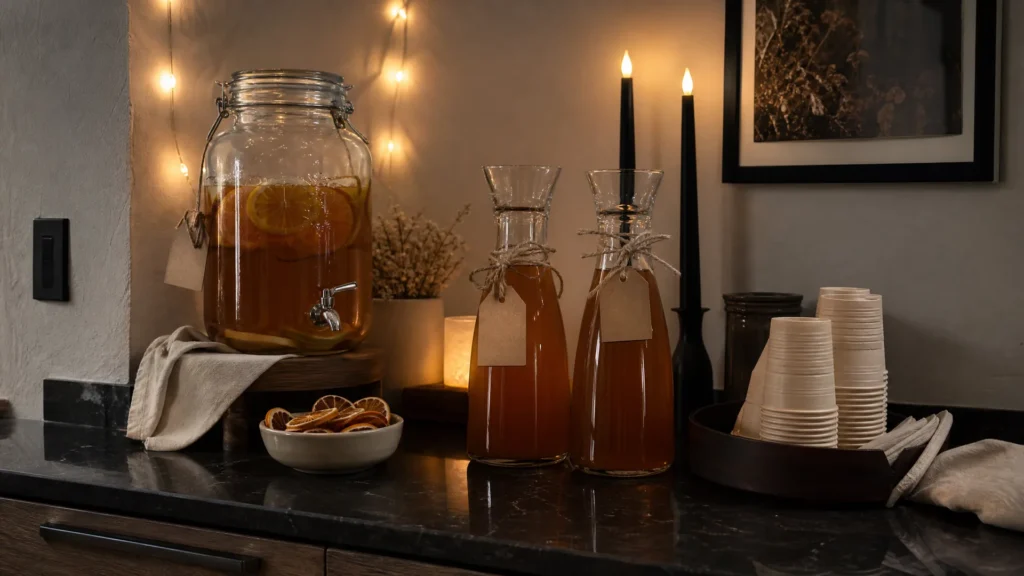
A small drink station turns the dining room into a party. Print or hand-write labels such as “Poison Apple Cider” or “Midnight Punch,” and tie them to pitchers, bottles or jugs with twine. Fill clear drink dispensers or thrifted decanters, and add cups and a few dried orange slices. Labels cost pennies; use stock paper and a plain serif font for a vintage look. The same labels double as place cards. Keep decorations clear of food and use only food-safe containers for drinks.
Cheaper option: write labels on kraft paper tags with a black marker and skip the printer.
Dollar-Store DIY Halloween Decor Under $10
Dollar-store aisles carry most of the raw materials. These three projects each stay under $10, with supply prices at typical dollar-store levels. Prices and stock vary by store.
14. Dollar-Store Pumpkin Makeover
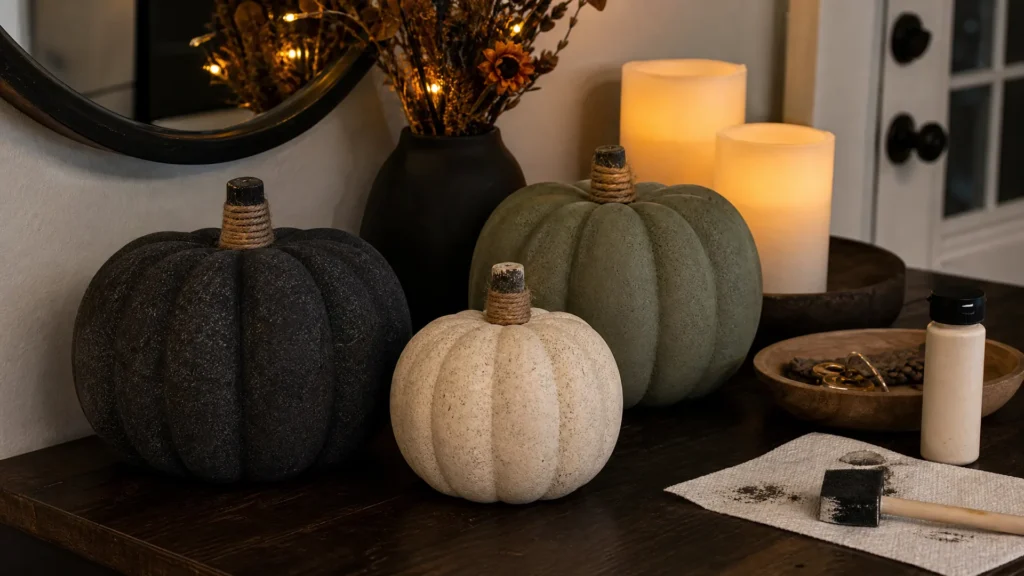
Plain foam pumpkins become mock ceramic with paint and a little texture. Brush on a coat of matte acrylic paint in black, cream or sage, then dab on a second coat with a sponge for a stone-like finish. Wrap a small piece of twine or ribbon around the stem. Three pumpkins and a bottle of paint cost $5 to $10 together. Group them in odd numbers on the mantel or the entry table.
Renter-safe tip: pumpkins on a tray or cake stand need no hooks and move easily when you vacuum.
15. Mini-Light Ghost Garland
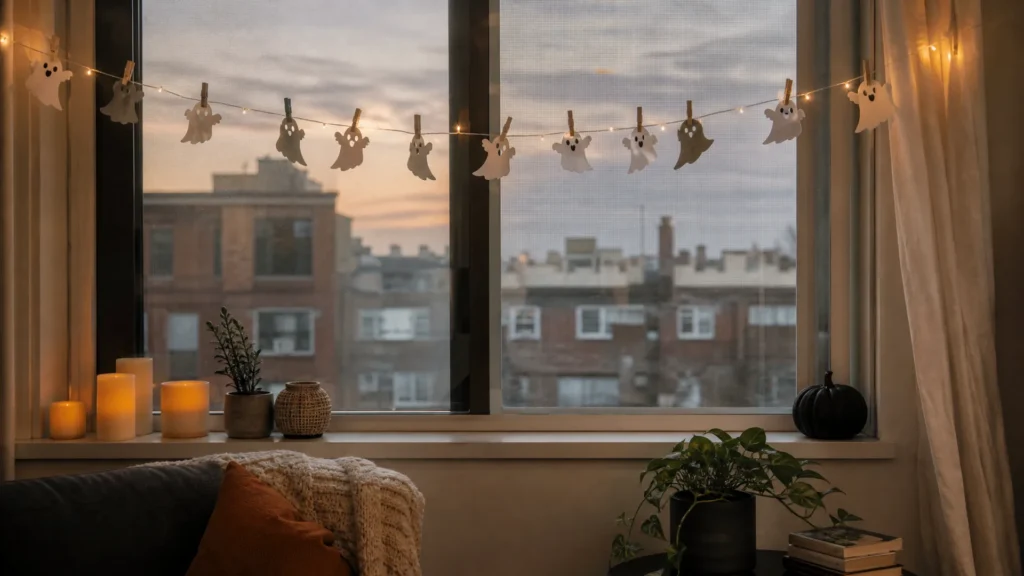
A string of tiny white lights and a few paper ghosts makes a soft glowing garland. Cut ghost shapes from white cardstock or felt, about 4 to 6 inches tall, punch a hole at the top, and thread them onto a string of battery LED mini lights. A strand costs $3 to $5. Drape the finished garland across a window, bookshelf or headboard. Choose battery LEDs, since they stay cool, and keep the lights from touching the paper directly. The U.S. Fire Administration’s holiday fire safety guidance covers lights and decorations.
Cheaper option: reuse a string of warm-white lights from last winter instead of buying new ones.
16. Framed Spell-Book Pages
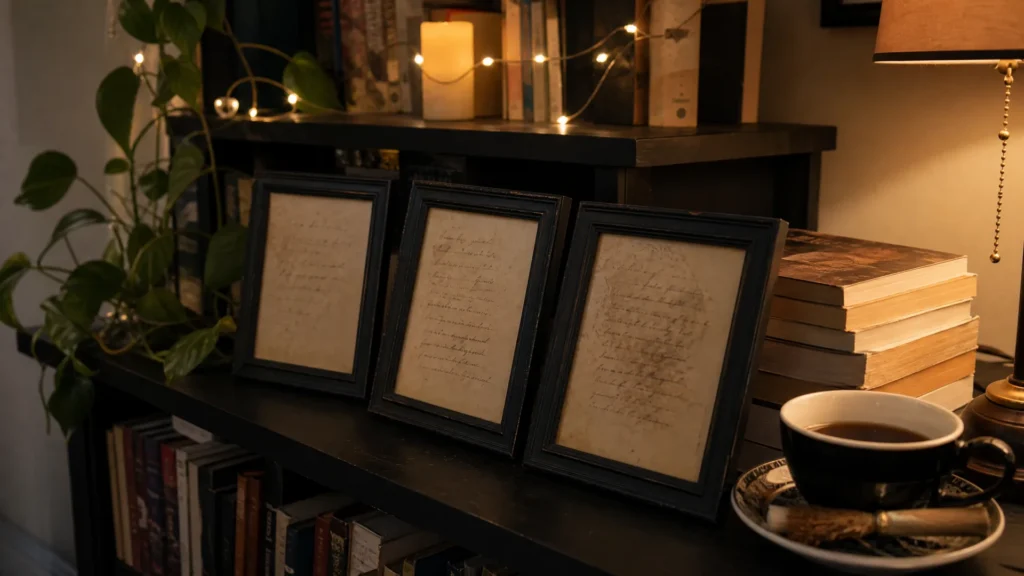
Old book pages in a dollar-store frame become instant spell-book art. Take a thrifted paperback or book you do not mind sacrificing, tear out a page, and tea-stain it by brushing on cooled black tea and letting it dry. Add a hand-lettered line like “Double, double toil and trouble” in black ink. Slip each page into a small frame; frames cost $1 to $3. Hang a row of three, or lean them on a shelf. Use only books you own, and do not use rare or valuable copies.
Renter-safe tip: stand the frames on a shelf or the top of a bookcase, so no hook or nail goes anywhere near the wall.
Supplies Checklist for Every Project Here
You can make almost everything in this guide from the same short shopping list. Buy it once and every project gets cheaper.
- Matte black spray paint or acrylic craft paint for frames, candlesticks, wreath forms and pumpkins.
- Black and white cardstock for bats, window silhouettes and ghost cutouts.
- Battery tea lights, LED tapers and warm-white mini lights. These cover every glow in the house without a flame.
- Removable hooks, painter’s tape and poster putty for walls, doors and windows.
- Cheesecloth, twine and a glue and water mix for ghosts, labels and wrapped details.
- Thrifted frames, jars and candlesticks. Check the thrift store’s housewares aisle and the dollar-store picture-frame shelf.
Set aside one box for the whole kit. A tidy supply box means you can start a project in five minutes when you have a free evening.
A Simple Three-Night Plan
If you work all week, spread the projects across three evenings instead of trying to finish everything on one weekend.
- Night one (45 minutes): Spray-paint the wreath form, frames and candlesticks, then let them dry overnight. Cut your bats and window silhouettes while you wait.
- Night two (45 minutes): Assemble the wreath, hang the bats and silhouettes, and set up the paper bag ghosts and battery tapers.
- Night three (30 minutes): Style the mantel with jars, painted pumpkins and the portrait frames. Step back, remove one item, and stop.
That last step matters. A shelf with six well-chosen pieces looks better than one with fifteen.
Safety Basics for Halloween Decor
Handmade decor uses paper, fabric and glue, so a few safety habits matter more than usual. Keep paper, cobweb and cheesecloth at least 12 inches from any heat source, including hot bulbs. Pick battery candles and LED lights over real flames, and never leave a lit candle unattended. Keep exits and walkways clear of decorations, and keep small pieces such as plastic spiders out of reach of young children and pets. The NFPA’s Halloween safety guidance and the U.S. Fire Administration’s holiday safety page cover fire risks in more detail.
Halloween Decor Styles at a Glance
Pick one style before you shop so your DIY pieces match. This table lines up each look with the best projects and a rough budget.
| Style | Look | Best projects | Typical cost |
|---|---|---|---|
| Spooky | Black, cobwebs, bats | Bat flock, cobweb chandelier, portrait gallery | $10–$25 |
| Elegant | Black, cream, gold | Black tapers, painted candlesticks, black floral wreath | $15–$40 |
| Cute | Cream, orange, soft ghosts | Paper bag ghosts, cheesecloth ghosts, ghost garland | $5–$15 |
| Vintage | Sepia, aged paper, brass | Spell-book pages, apothecary jars, potion bar labels | $10–$25 |
For more on matching your decor to your home’s style, see our guide to fall decor styles. If you lean toward the elegant look, our neutral home decor ideas share the same cream-and-black palette.
DIY Halloween Decor Budget Guide
You can decorate three zones for under $25, or build a full set for under $100. Use these ranges as planning estimates; prices vary by store and region.
| Budget | What it covers | Sample projects |
|---|---|---|
| Under $25 | Door plus mantel | Paper bag ghosts ($3–$5), no-carve pumpkin trio ($8–$12), window silhouettes ($5–$8) |
| Under $50 | Door, mantel and one wall | Add a bat flock ($3–$6), LED tapers ($8–$15), cheesecloth ghosts ($3–$5) |
| Under $100 | Full home and a table | Add a black floral wreath ($10–$20), portrait gallery ($10–$25), painted candlesticks ($5–$12) |
If your living room is the main space, see these living room decor ideas for layout and shelf styling that work with any holiday display.
3 Halloween Decorating Mistakes to Avoid
A few small choices keep handmade decor from looking messy. Avoid these three.
- Using too many colors. Orange, purple, green, red and neon together read as a party store. Keep to black, cream and one accent so each project supports the others.
- Putting paper or fabric near heat. Cobweb, cheesecloth and paper burn quickly. Use battery candles and LED lights, and read the NFPA’s Halloween safety guidance before you decorate with anything flammable.
- Hanging heavy pieces on adhesive hooks. A framed print can fall if it exceeds the hook’s weight rating. Check the package weight limit, or lean frames on a shelf. Pieces like the paper bat flock weigh almost nothing and suit putty or tape.
Frequently Asked Questions
How do I decorate for Halloween in an apartment without damaging walls?
Use removable adhesive hooks, painter’s tape and poster putty, and test one hidden spot for 24 hours first. Lean frames, branches and pumpkins on shelves instead of hanging them. Cardstock bats, window silhouettes and ghost garlands all stick on and peel off cleanly. For more renter-friendly ideas, see our apartment decor ideas.
What are the cheapest DIY Halloween decorations?
Paper bag ghosts, cardstock bats and window silhouettes cost under $1 to $8 each. Painted jars and thrifted frames come next, at $0 to $4 apiece. These are the cheapest because paper, paint and recycled jars do most of the work.
How early should I put up Halloween decor?
Most people start in the first or second week of October, about three to four weeks before Halloween. Handmade paper and fabric pieces stay fresh looking longer indoors than real pumpkins, so you can start earlier without worrying about rot. Take everything down in the first week of November.
How do I make DIY Halloween decor look expensive?
Limit yourself to two or three colors, repeat shapes in odd numbers and spray-paint mismatched pieces the same matte black. Add one metallic accent, such as a gold paint pen on a candlestick rim. Group items by height on a tray, and the display looks styled, not scattered.
Is Dollar Tree Halloween decor worth buying?
Yes, for raw materials such as foam pumpkins, frames, jars, cobweb, string lights and craft paint. Paint and re-style them so they match your palette, because store colors are usually bright. Stock and prices vary by store, so check before you plan around one item.
Final Thoughts
Start small: paint three pumpkins and set out two battery tapers tonight, then add one project each evening this week. When the season ends, store each project in its own box, and the same pieces come out again next year. After Halloween, our Christmas living room decor ideas pick up the cozy look. Want more renter-friendly ideas each week? Join the House Decor Ideas newsletter.