18 DIY Home Decor Ideas That Look Expensive
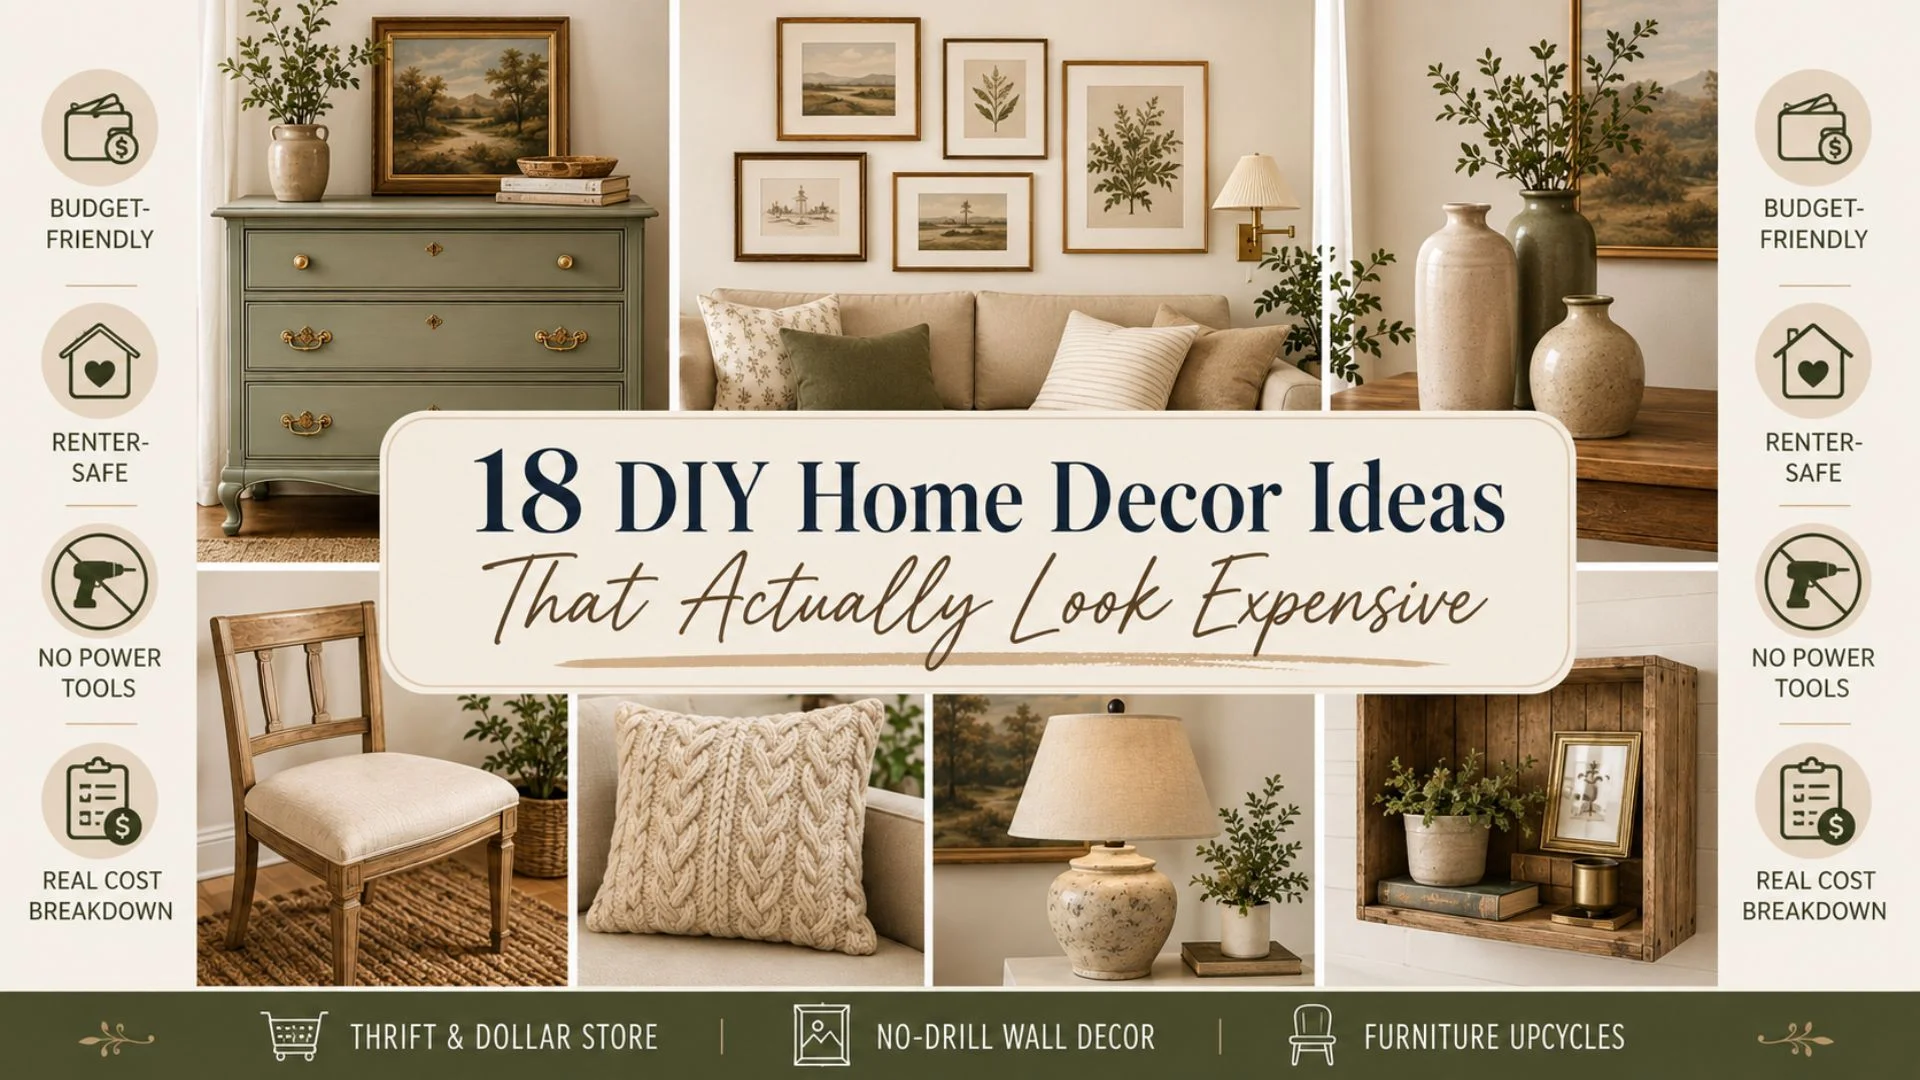
DIY home decor includes creative, budget-friendly projects that make your home feel more personal and polished. If you want a refined look without spending much, these 18 ideas use simple materials, renter-safe updates, and thoughtful styling. For more inspiration, browse these practical home decorating ideas, including these wall decor ideas before choosing your first project.
To make DIY decor look expensive, stick to a limited color palette and improve rough finishes with paint or trim. Use inexpensive materials, such as acrylic paint, for small accents, then add texture through wood, fabric, or baskets. Finish with home accents like trays, vases, and warm lighting to make budget materials feel cohesive and considered.
Key Takeaways
- Choose simple materials, limited colors, and polished finishes to make DIY decor look more expensive.
- Focus on renter-safe updates, such as removable artwork, peel-and-stick accents, and styling changes that leave walls untouched.
- Set a clear budget for each project, with many ideas costing about $10 to $50 in supplies.
- Use simple craft projects to add texture through wood, fabric, baskets, mirrors, and warm lighting, then browse these budget home decor ideas for more low-cost inspiration.
- Choose oversized wall art for a high-impact, low-cost update. Reuse thrifted items and improve them with paint, trim, new hardware, or careful placement.
What Makes DIY Projects That Actually Look Expensive?
The best DIY projects look polished because every choice feels intentional. A limited palette, smooth finish, proper scale, and a little empty space reflect core interior design principles. Together, they can make simple materials look custom. Before buying supplies, browse these home decor room ideas for ways to combine those details.
Keep One Cohesive Color Palette
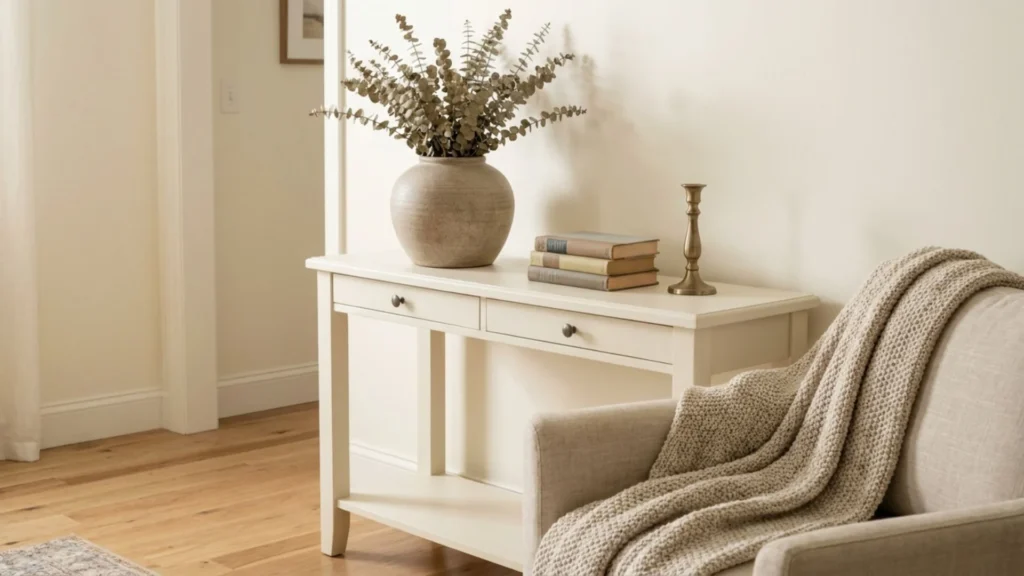
Start with one base color, one supporting neutral, and one accent shade. For example, warm white with tan and aged brass feels soft and classic. Soft gray, cream, and deep green create a calmer, richer look.
Repeat each color at least three times so the room feels connected. Use the base shade on a painted tray or wall, the neutral in a throw or basket, and the accent in art, vases, or hardware. Repetition makes separate DIY projects look as though they belong together.
Avoid mixing several bright colors or unrelated finishes. A shiny silver knob, orange paint, and cool blue fabric can make a project feel random, even when each item looks attractive alone. For a budget test, collect paint swatches and place them beside items you already own. Check the palette in morning and evening light before spending money on supplies.
Spend on Finish, Not Quantity
One carefully finished project usually looks better than five rushed crafts. Sand rough edges, prime porous surfaces, and apply two or three thin paint coats instead of one heavy coat. After the paint cures, seal high-use pieces such as tables, trays, and shelves.
The finish also changes the mood. Matte paint hides small flaws and feels modern, satin adds gentle light reflection, and high-gloss paint creates drama on smooth, well-prepared surfaces. Choose hardware with a consistent appearance, such as aged brass or brushed nickel, rather than mixing several metals.
Pro tip: Use painter’s tape along trim, borders, and geometric shapes. Press the edge down firmly, then remove the tape while the final coat is slightly soft for a cleaner line.
Let every coat dry for the time listed on the label. Skipping dry time can cause fingerprints, peeling, or cloudy sealer. Also, don’t overload your brush, since thick paint leaves ridges and visible drips.
Scale Pieces to the Room, Not the Surface You Made Them On
A large artwork panel, properly sized rug, full-height curtain, or well-proportioned coffee table often looks more custom than many tiny decorations. Group smaller objects with breathing room, leaving about 6 to 10 inches between grouped pieces when the arrangement allows.
Place at least the front legs of seating on an area rug whenever possible. Hang curtains close to the ceiling and let them reach the floor, even if the window is small. These choices draw the eye upward and give inexpensive materials a stronger presence.
For a small room, choose one oversized mirror or artwork piece instead of several little frames. Renters can use removable hooks, tension rods, and leaning artwork to create impact without drilling. Keep pathways clear, then remove a few objects before adding anything new. A decluttered surface often looks more expensive than a crowded one.
DIY Home Decor Projects You Can Finish This Weekend
These approachable weekend craft projects create visible results within one or two days. The numbered ideas include step by step instructions for polished updates, offering a refined alternative to small, disconnected handmade crafts. For more polished room updates, pair them with these expensive-looking living room decor ideas.
Painted Accent Wall or Panel Moulding Look
Create a rich focal wall with paint alone or evenly spaced lightweight moulding. Budget $35 to $120, with one weekend for planning, installation, painting, and drying. Paint typically costs $25 to $60, 1.5 to 2-inch trim strips $20 to $60, adhesive $6 to $12, caulk $5 to $8, and tape $5 to $10. You may also need a level and small roller for $8 to $20 each.
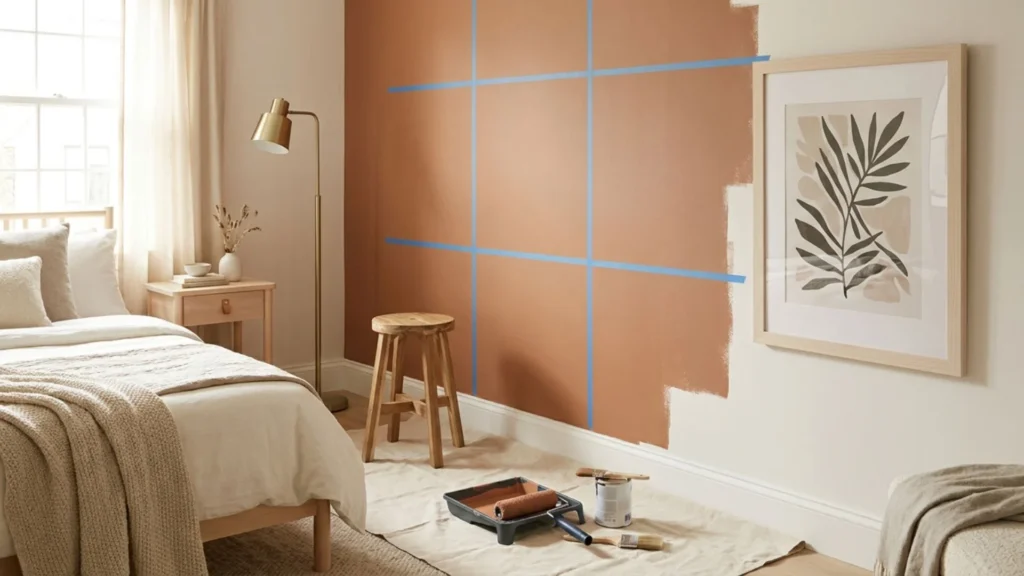
For a renter-safe update, use paint only after landlord approval, then repair holes and repaint before moving out. Removable moulding can work with temporary adhesive strips, but test a hidden area first and keep the pieces lightweight.
- Mark evenly spaced rectangles with a level and painter’s tape.
- Attach trim with removable adhesive, caulk gaps, then paint everything.
Deep green or navy looks refined without feeling busy. A same-color treatment in matte and satin sheens adds subtle depth. Avoid uneven spacing, which makes even quality materials look careless. For detailed installation guidance, follow this accent wall moulding tutorial.
Framed Fabric or Wallpaper Remnant Art
Turn a 24 by 36-inch fabric remnant or peel-and-stick wallpaper sample into oversized wall art in one to two hours for $20 to $75. Fabric or wallpaper usually costs $5 to $30, foam board $5 to $12, spray adhesive $6 to $10, and a utility knife $5 to $10. A thrifted frame can cost $10 to $25.
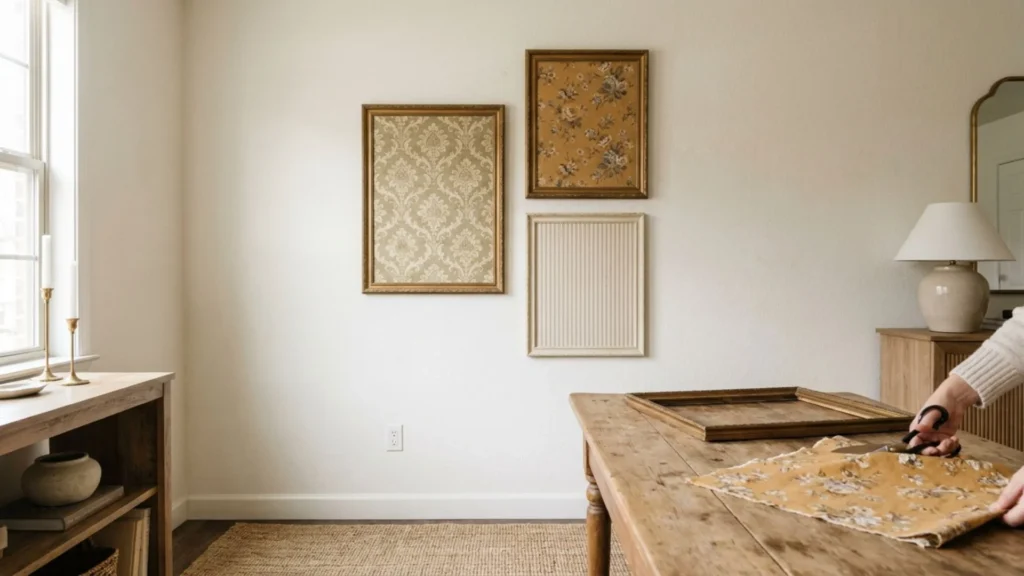
Mount the material to foam board, smoothing from the center outward. Align repeating patterns before trimming, then fold excess fabric behind the board. For suitable paper, mod podge can replace spray adhesive. Choose a calm print that repeats one or two colors already in the room. Use temporary hanging strips for rentals, and never apply permanent adhesive directly to a rental wall.
Braided or Dip-Dyed Throw Pillow Covers
New covers make a sofa look tailored without replacing the inserts. Plan on $12 to $45 per set and two to four hours. An 18 by 18 or 20 by 20-inch cotton or linen-blend cover costs $6 to $18, dye $4 to $10, cord $3 to $8, and fabric glue $4 to $8. A sewing machine is optional.
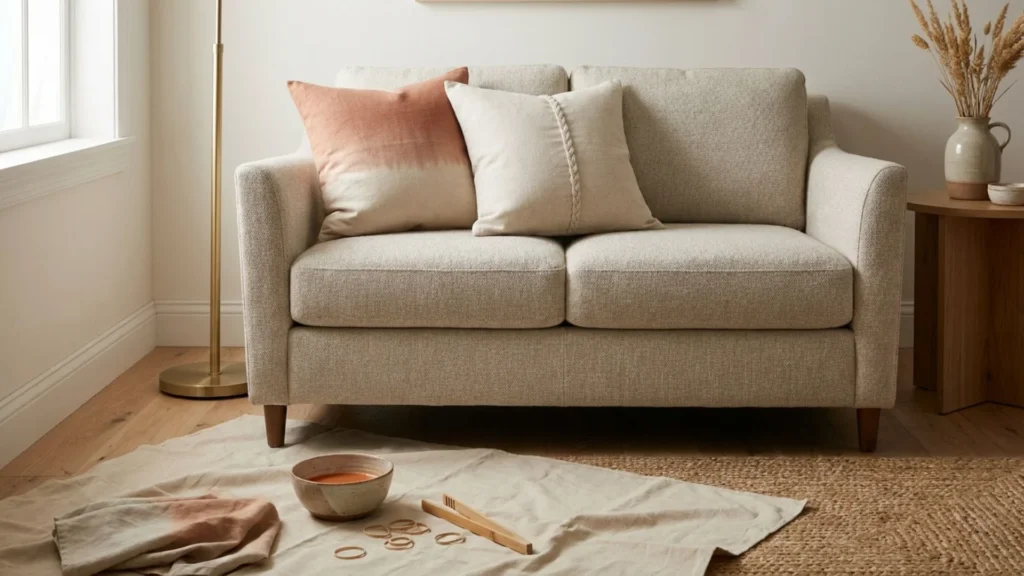
Cut overlapping fabric panels for an envelope cover, or refresh existing covers with a controlled dip-dye edge. Add braided cord with fabric glue or a simple stitch. Use two or three related colors, then wash a scrap first to test colorfastness. Removable covers are renter-friendly. Avoid soaking the entire pillow, which often creates uneven dye marks.
Floating Shelf Ledge From a Single Board
A slim picture ledge displays books, art, or small plants while keeping surfaces clear. Expect $18 to $55 and two to three hours, excluding drying time. A 1 by 4 or 1 by 6-inch board costs $8 to $20, a narrow front lip $3 to $8, glue $4 to $7, screws or brackets $5 to $15, sandpaper $3 to $6, and stain or paint $6 to $12.
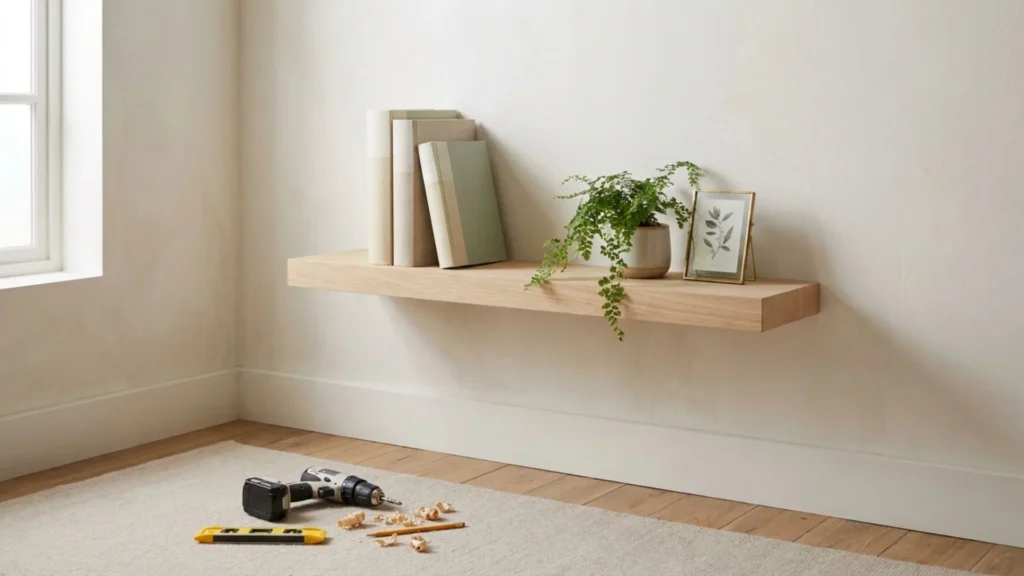
Cut the board, sand every edge, attach the front lip with glue and screws, then finish and mount it with wall anchors. Keep the ledge shallow, group objects in odd numbers, and avoid heavy stacks. Renters can use a freestanding ledge or an existing picture rail instead of drilling. A common mistake is making the shelf too deep for the wall or loading it beyond the hardware rating.
Dollar Store and Thrift DIY Decor Swaps
DIY decor swaps and thrifted finds look polished when you repeat one finish, limit styles, and group pieces with purpose. This approach gives upcycled decor a coordinated look without making a room feel overdone. Clean every secondhand item first, check for chips or cracks, and keep only pieces that support your room’s palette. For more inspiration, browse these budget home decor ideas.
Dollar Tree Vases Sprayed and Grouped by Height
Create a coordinated centerpiece with 3 to 5 glass or ceramic vases. Plan on $8 to $25 and one to two hours, plus drying time. Vases cost $1 to $5 each, spray primer $5 to $8, spray paint $5 to $10, painter’s tape $3 to $6, floral stems $3 to $8, and felt pads $2 to $4.
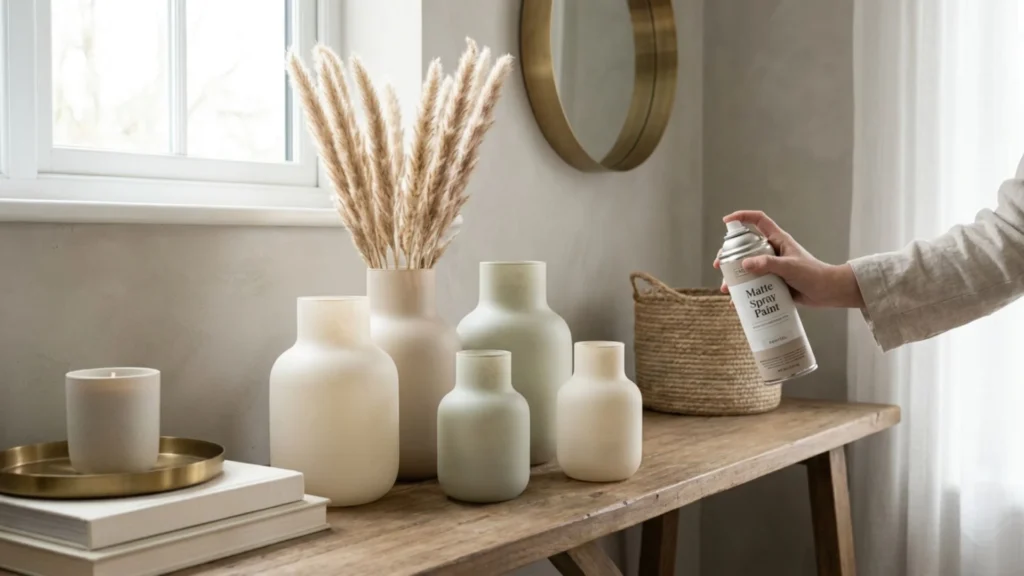
Wash away dust and grease, let each vase dry, then tape any areas you want unpainted. Apply spray primer outdoors or in a well-ventilated area, followed by two light coats of satin black, warm white, stone, or muted brass. Let the pieces dry fully before adding felt pads and arranging them by height with simple floral stems.
Avoid overly shiny paint, damp weather, and heavy coats. Wear a mask, protect nearby surfaces from overspray, and don’t handle or style the vases until the finish cures.
Thrifted Frames Repainted and Gallery-Walled
Thrift store finds become a chic gallery wall when they share one finish and consistent spacing. Expect $15 to $65 for four to eight frames and three to five hours. Frames cost $2 to $12 each, primer $5 to $10, paint $6 to $15, sandpaper $3 to $6, hanging strips or hooks $6 to $15, and printed art $2 to $12.
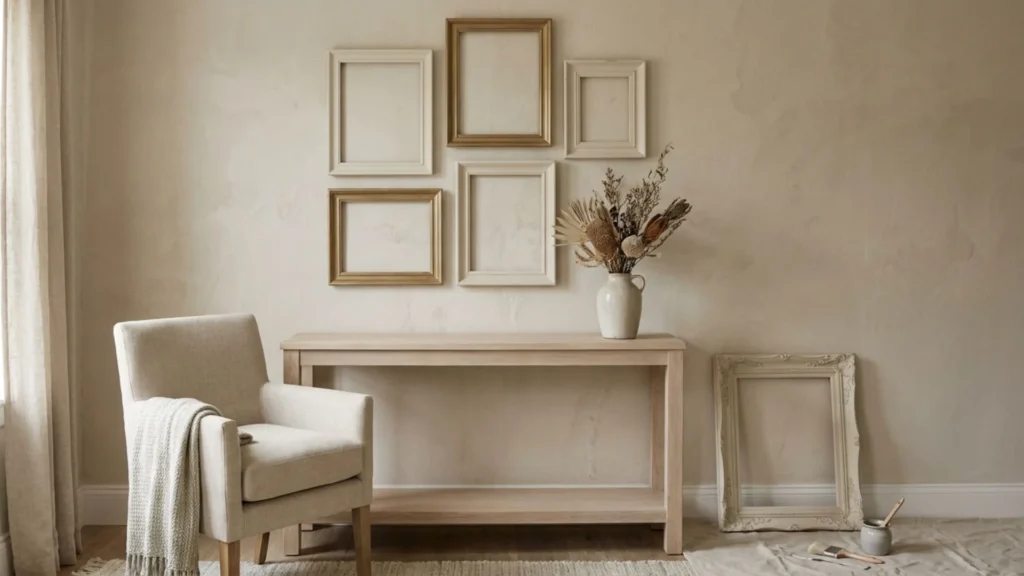
Clean and lightly sand each frame, prime, and paint after the surface dries completely. For a small, properly prepared frame, acrylic paint can provide an easy finish. Test the arrangement on the floor, balancing large and small pieces, then leave 2 to 3 inches between frames. Repeat one mat color to make different shapes feel related.
Renters can use Command-style strips, but check each strip’s weight limit before mounting. Don’t hang frames while paint feels soft, or edges may stick to the wall.
Glassware Turned Into Candle Holders
Thrifted glasses, small bowls, and clear jars can form an elegant candle grouping for $10 to $35 in 30 to 60 minutes. Vessels cost $1 to $6 each, taper or battery candles $3 to $12, floral wire or decorative beads $2 to $6, felt pads $2 to $4, and a tray $5 to $12. For a Christmas version, tie velvet bows around brass candlesticks instead.
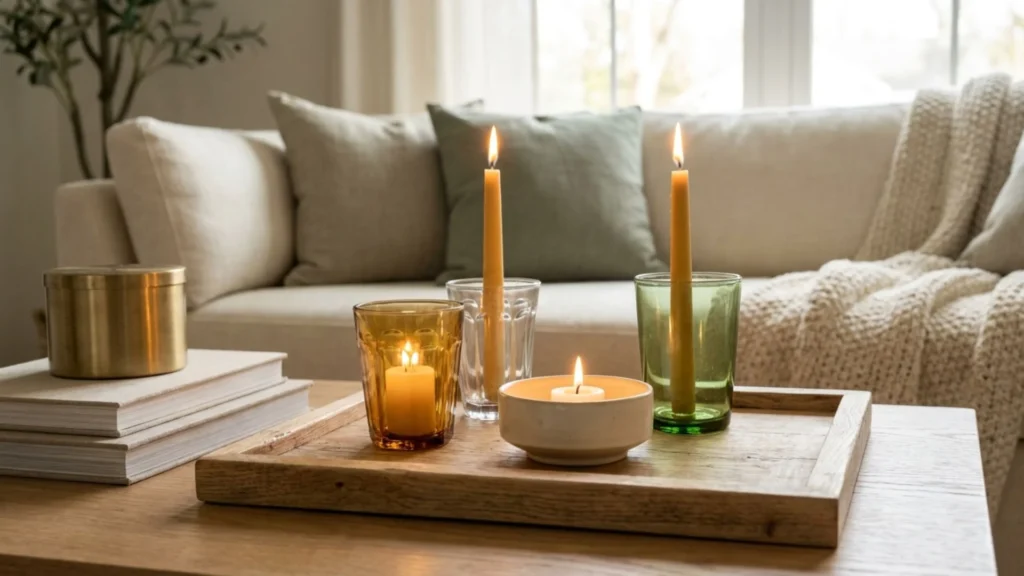
Wash and dry every vessel, then check that each base sits flat. Add a small amount of filler only when needed, and arrange the pieces at different heights on a tray for a coffee table. Use battery candles on shelves, in rentals, or around children and pets. With open flames, keep candles upright, supervised, and away from fabric or paper. Skip unstable glasses, flammable filler, and overly mixed styles.
Thrifted Books Styled as Color-Blocked Stacks
Used books add height and color to a coffee table, console, or shelf for $5 to $30 in 20 to 45 minutes. Choose 3 to 8 hardcover books at $1 to $5 each, then add removable paper or fabric wraps for $2 to $8, ribbon for $2 to $5, a tray for $5 to $12, and one small object for $2 to $8.
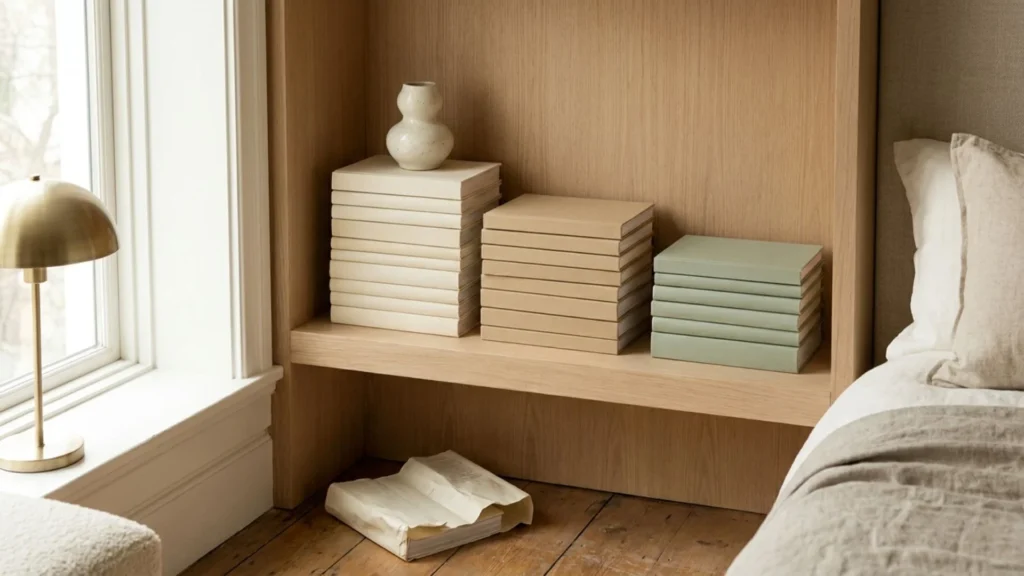
Sort books by muted color, stack the largest on the bottom, and finish with a bowl, candle, or small vase. Natural textures can add rustic charm without disrupting the palette. Repeat one accent color elsewhere in the room. Keep books readable and useful, and avoid making every stack identical, which can make the arrangement feel staged.
No-Drill DIY Wall Decor for Renters
Renter-friendly DIY styling adds personality without permanent wall changes. These projects use removable hardware, lightweight materials, and careful placement. Your walls can look finished while your lease stays intact. For more space-saving inspiration, browse these small apartment decorating ideas.
Command-Strip Gallery Wall Grid
A clean grid of framed prints gives a rental wall the tailored look of a designer installation. Gather 6 to 9 lightweight frames, printed art, a measuring tape, level, pencil, paper, and properly sized removable strips. Expect to spend $25 to $90 and 2 to 3 hours, depending on your frames and printing costs.
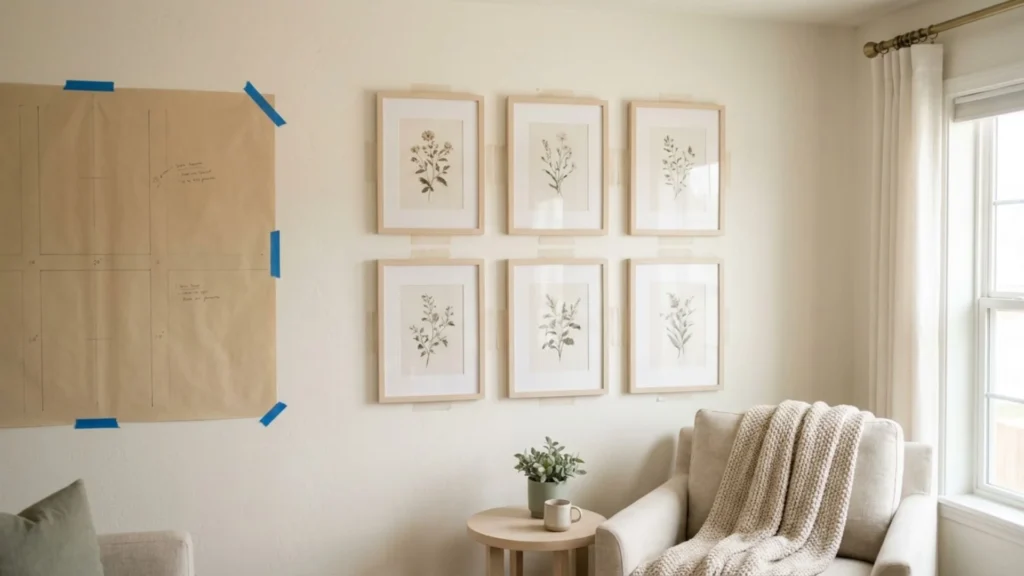
Trace each frame onto paper, cut out the templates, and arrange them on the floor first. Tape the templates to the wall, mark equal spacing, and keep a 2 to 3-inch gap between frames. Clean the wall using the method listed on the strip package. Let it dry, then press each strip firmly for the required time before attaching the frame.
Follow the package weight limits, and test a hidden area when possible. Avoid dusty, freshly painted, textured, or damp walls unless the manufacturer confirms compatibility. The Command weight limit guide can help you select the right strips.
Leaning Oversized Art Instead of Hanging
One large canvas or framed print can create a strong focal point without drilling into the wall. Choose a 24 by 36-inch or 30 by 40-inch lightweight piece, thrifted wall art or a home print, non-slip pads, and a narrow console or sturdy shelf. The project costs $20 to $100 and takes 30 to 90 minutes.
Place the pads beneath the frame, lean it securely against the wall, then layer a smaller frame in front. Leave breathing room around the artwork so it feels intentional, especially in an entryway or small apartment. Add adhesive bumpers or museum putty at the top when the surface allows.
Secure the piece against tipping in homes with children or pets, and avoid high-traffic paths. Never place a heavy glass frame where it could slide or fall.
Removable Wallpaper Accent Panel
Create custom-looking wall art with peel-and-stick wallpaper mounted on foam board or lightweight plywood. You’ll need a straightedge, smoothing tool, utility knife, removable hooks, and wallpaper. Budget $25 to $95 and allow 2 to 4 hours.
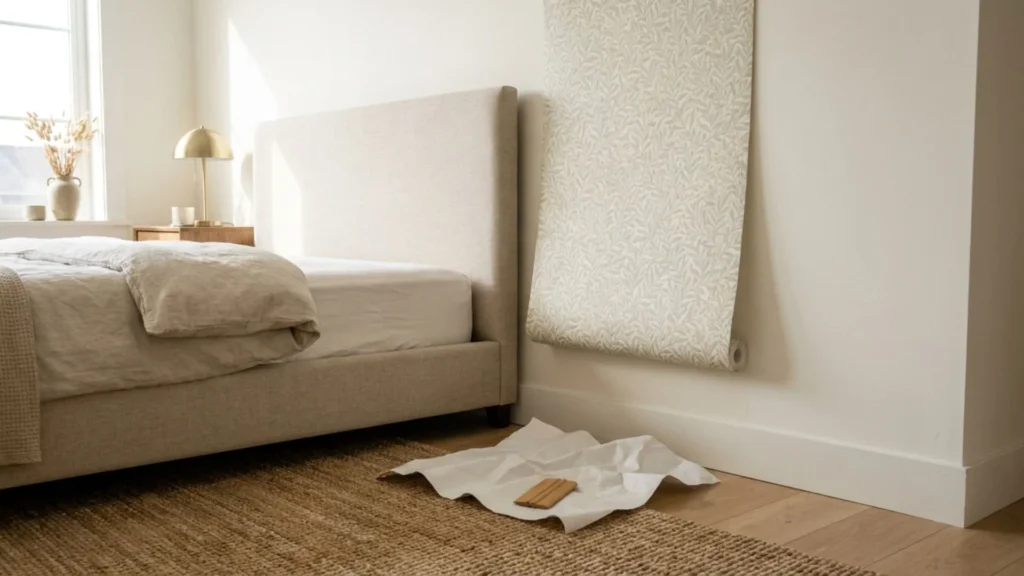
Measure the panel, cut the wallpaper with extra material at each edge, and match the pattern before pressing it down. Smooth from the center outward, then trim the edges with a sharp knife. Mount the finished panel with hooks, or apply wallpaper directly only to an approved, smooth wall.
A freestanding, board-mounted version is the safest renter option. Use one large pattern instead of several small prints, and check for bubbles, crooked seams, or unapproved surfaces before installation.
DIY Furniture Upcycles and Painted Accents
Small furniture updates can create a striking before-and-after effect. A thoughtful furniture makeover can turn a dresser, chair, or coffee table into a custom-looking piece. With careful preparation, fresh fabric, or aligned hardware, even basic furniture can look polished without stretching your budget. Pair these projects with more budget home decor ideas for a cohesive room refresh.
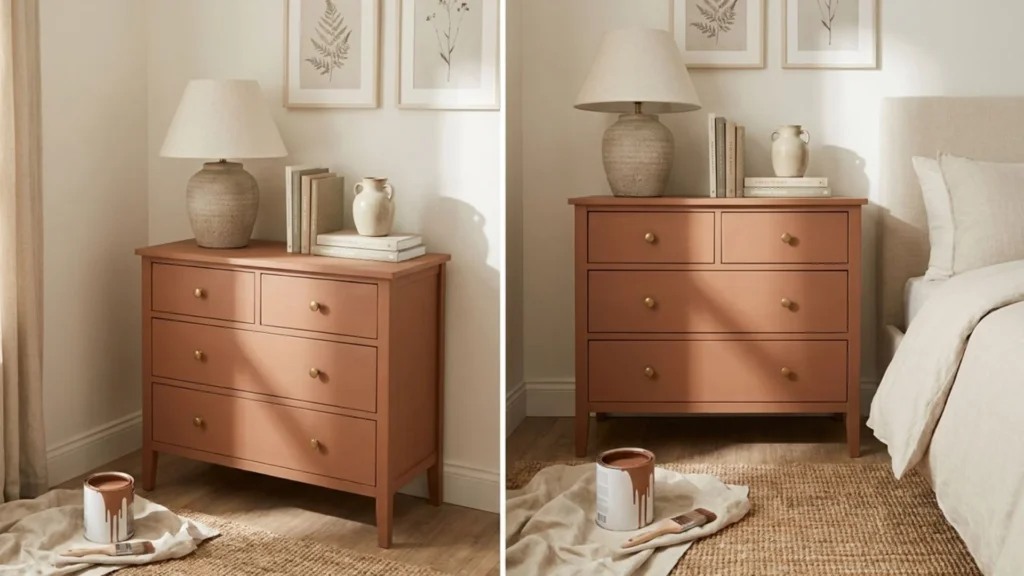
Painted or Stained Thrifted Dresser
A cleaned and properly finished dresser can anchor a bedroom or entryway with the presence of a custom piece. Expect to spend $65 to $220 total, including a $30 to $150 thrifted dresser, cleaner, sandpaper, bonding primer, paint or stain, foam rollers, brushes, drop cloths, and water-based sealer. Allow one to two days, with a beginner-to-intermediate skill level.
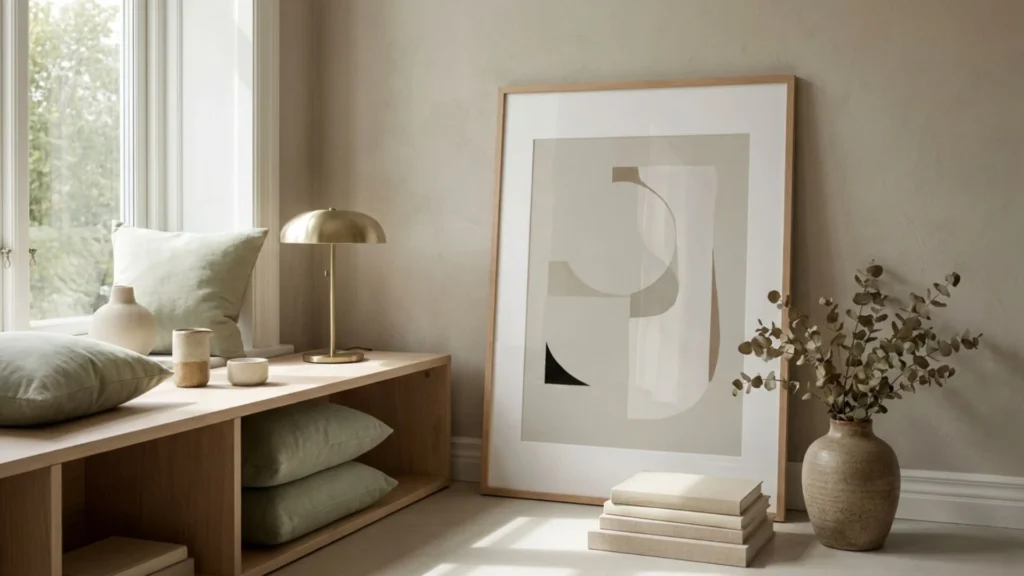
First, test the old finish in a hidden spot, then clean, repair loose joints, fill dents, and sand dull. Apply bonding primer, followed by thin coats of furniture paint. Water-based acrylic paint formulated for furniture is one suitable option. Let each coat dry, then allow the final finish to cure before sealing. A soft neutral, deep green, or warm wood tone gives the piece a polished look. If the grain is attractive, skip paint and use stain after sanding.
Work in a ventilated area, especially when testing an older finish. Don’t place heavy decor on the surface until the sealer fully cures. This thrifted dresser makeover shows how preparation can change an inexpensive find.
Reupholstered Chair Seat
Replacing worn fabric can make a plain dining or accent chair look fresh and tailored for $25 to $85 per chair. The same method can refresh a suitable storage bench seat. Gather 1 to 2 yards of upholstery fabric, batting, a staple gun, staples, scissors, a screwdriver, and optional trim. Most seats take one to three hours.
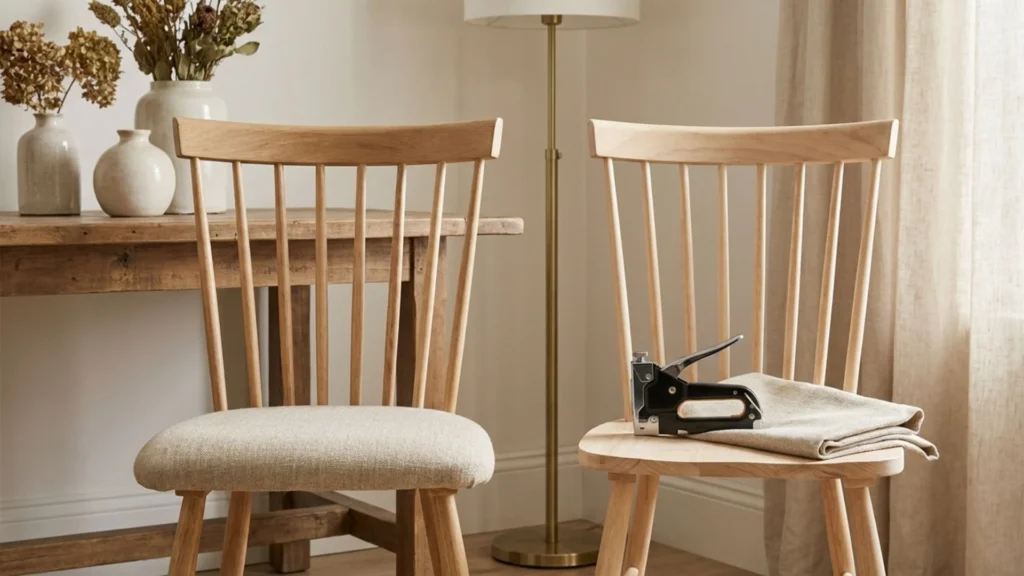
Photograph the original assembly before removing the seat with a screwdriver. Use the old fabric as a template, center the pattern, and pull the new fabric evenly. Staple opposite sides first, then fold neat corners and trim excess. Choose durable fabric with a small-scale pattern or solid texture.
Don’t cover structural damage, and never staple over loose fabric. Repair the frame or replace damaged padding before adding the new cover.
Cabinet Hardware Swap
New knobs or pulls can make a kitchen, bathroom vanity, dresser, or media console feel intentional while supporting kitchen organization in 30 to 90 minutes. Budget $15 to $120 for 6 to 12 pieces, priced around $2 to $12 each, plus a screwdriver, measuring tape, hardware template, filler, and touch-up paint.
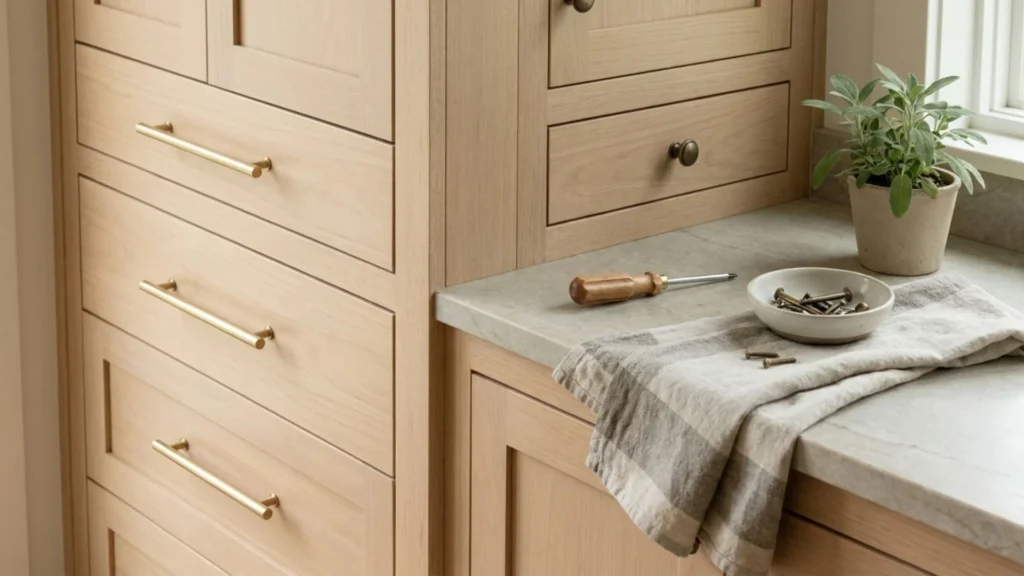
Measure existing center-to-center hole spacing before shopping. Fill unused holes, let the filler dry, and touch up the surface. Mark a template for new placements, then tighten each piece evenly. Satin brass, aged bronze, or matte black can create a consistent finish throughout the room.
Never force a screw or choose pulls that don’t match the existing measurement. Misaligned hardware makes even a freshly painted piece look unfinished.
DIY Lighting and Textile Updates
Warm light and coordinated textiles can make a room feel more expensive faster than adding more decorative objects. DIY lighting and textile updates soften hard surfaces, improve proportions, and create a finished look with practical weekend craft projects. Crochet projects can also add handmade texture in smaller doses.
Rewired or Restyled Thrifted Lamp
A thrifted lamp can look custom after a clean shade and base refresh, or become safe again with professional rewiring. Budget $25 to $110 and allow 1 to 3 hours for restyling, with beginner skill for cosmetic changes.
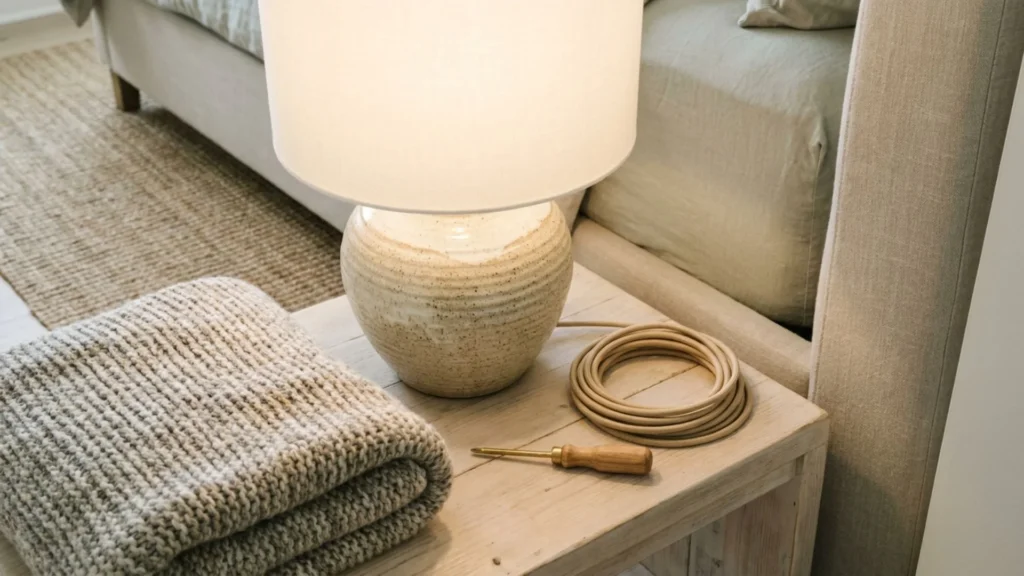
Gather a thrifted lamp base ($5 to $40), a new shade ($12 to $45), a warm LED bulb ($3 to $12), cleaner ($3 to $8), spray paint or rub-on finish ($6 to $15), and felt pads ($2 to $5). Add a replacement cord and socket kit ($10 to $25) only when a qualified professional confirms the repair is suitable.
- Unplug the lamp, remove dust and grease with cleaner, and let the base dry. Lightly sand glossy areas before applying thin spray-paint coats, or use a rub-on finish for a quicker update.
- Choose a shade whose width closely matches the base, then add felt pads beneath it to protect furniture. Select a warm LED bulb around 2700K to 3000K for a soft, welcoming glow.
- Never use a cracked socket, frayed cord, or bulb that exceeds the lamp’s rating. Electrical rewiring should follow local guidance or be handled by a qualified professional.
For visual inspiration, browse this thrifted lamp makeover, but treat safety checks as essential rather than decorative.
No-Sew Curtain and Table Runner Refresh
Fresh hems can make ready-made curtains and a simple table runner look tailored for $20 to $95 in 1 to 2 hours, with beginner skill. Use ready-made curtains or fabric ($12 to $60), iron-on hem tape ($4 to $10), an iron, measuring tape, curtain rings or clips ($4 to $15), and optional trim ($3 to $10).
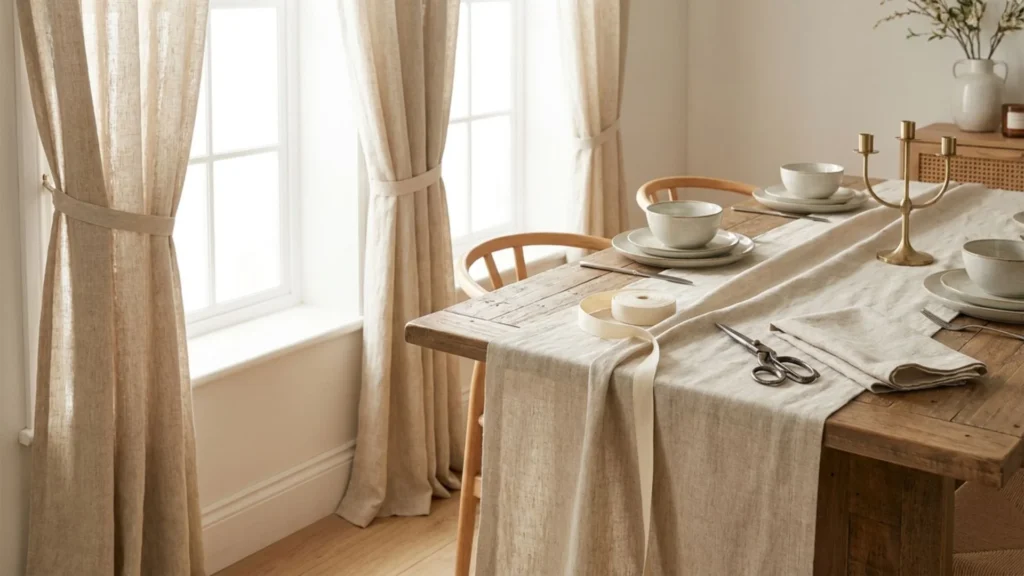
Measure curtains so they skim the floor or create a light break, then press an even fold before applying hem tape. For a matching runner, cut fabric straight, fold each edge evenly, press it flat, and secure the hem with tape. Choose a fabric weight that hangs well, and coordinate decorative pillows for a cohesive textile scheme. A finished runner can also anchor a coffee table while reinforcing the room’s color palette.
Test the fabric’s care label on a hidden section before using heat. Poorly measured curtains can make ceilings look lower, so hang the rod high and keep the fabric full enough for graceful folds. A seasonal textile update also pairs well with this holiday decor refresh.
DIY Storage and Organization Projects
Functional storage projects can look custom when finishes match, labels stay consistent, and open space balances the display. They work especially well for home organization in small rooms, entryways, and busy family areas.
Repurposed Crate or Basket Shelving
Turn 2 to 4 wooden crates or sturdy baskets into open storage for blankets, books, toys, or plants. Plan on $25 to $100, 2 to 4 hours, and beginner skill. Gather sandpaper ($3 to $8), stain or paint ($8 to $20), screws or construction adhesive ($5 to $15), wall anchors ($5 to $12), and shelf liners ($4 to $10). For a visual example, see this wooden storage crate tutorial.
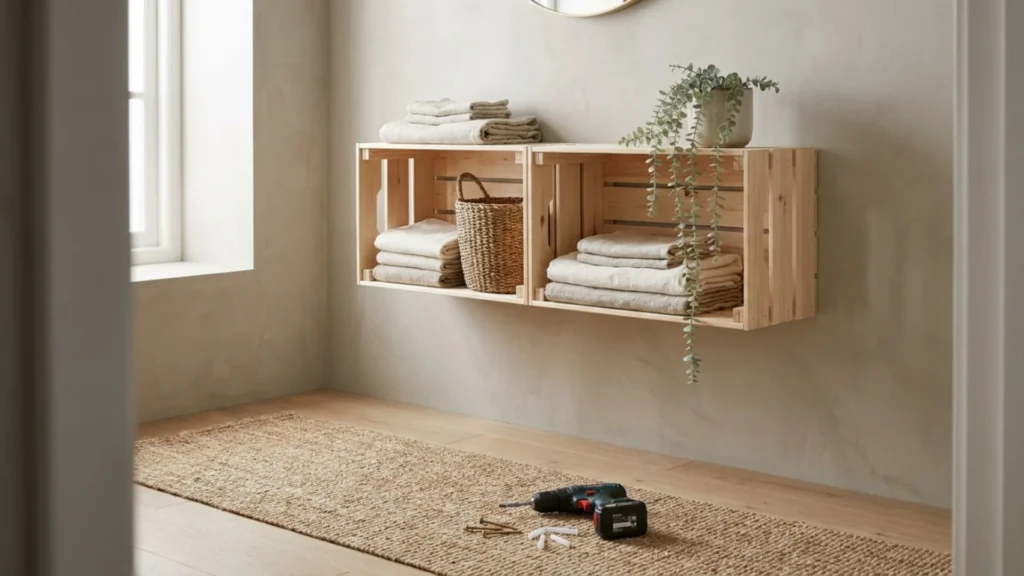
- Clean each crate or basket, remove loose staples, and sand rough edges until fabric and hands won’t snag. Apply matching stain or paint, then let every piece dry fully.
- Stack the crates in an offset arrangement, or mount them in a straight grid. Use screws for wood-to-wood connections, adhesive only for lightweight setups, and shelf liners to protect delicate items.
- Secure each unit to the wall with properly rated anchors, especially above a desk, in a child’s room, or near an entryway.
A low crate can organize books, blankets, or remotes near or beneath a coffee table. One securely finished crate can also serve as a lightweight planter box, but only with a suitable plant, moisture protection, and a safe load rating.
Leave a few sections open so the arrangement doesn’t look heavy. Add woven baskets inside open crates to hide small items and keep visual clutter contained. Never mount heavy crates with weak anchors, and check the wall material before loading the shelves.
Closet or Entryway Hook Rail
A simple hook rail gives coats, bags, and keys a custom built-in look for $20 to $70 and 1 to 3 hours. Use a 1 by 6-inch board ($8 to $20), 3 to 5 hooks ($3 to $10 each), paint or stain ($8 to $15), screws ($4 to $8), wall anchors ($5 to $12), a level, and optional labels ($3 to $8).
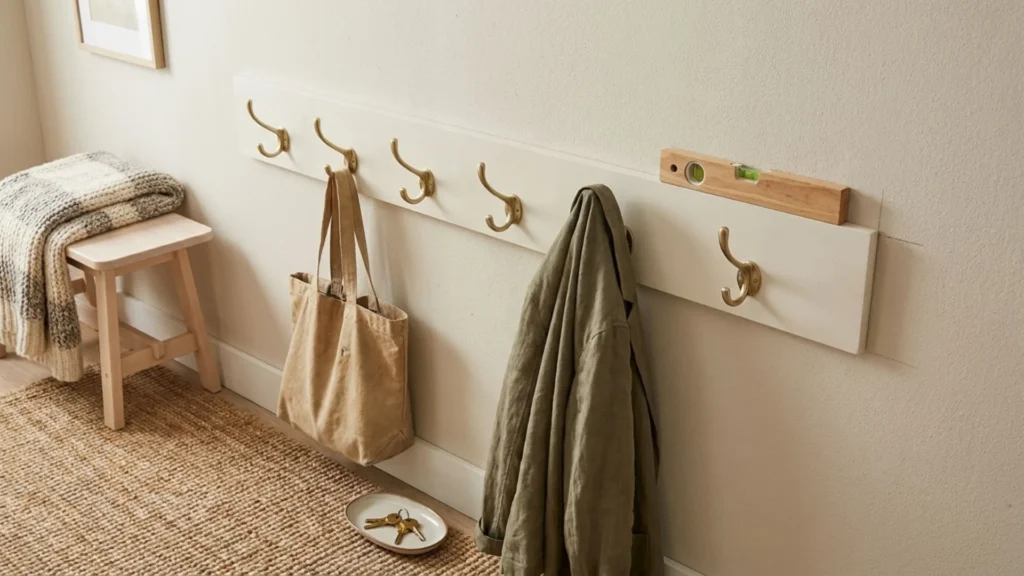
The board-and-hook version is one of the simplest woodworking projects. Sand the board smooth, wipe away dust, and apply two thin finish coats. Mark hooks at least 6 to 8 inches apart, then locate studs whenever possible before drilling. Match the drilling and anchoring method to the wall material.
Level the board, attach it securely, and add simple labels for family members or storage zones. For an entryway without wall space, choose a suitable storage bench instead.
For a renter-safe version, use a freestanding coat rack or removable adhesive hooks on a smooth, approved surface. A properly secured hook rail can also work on a covered front porch. Check each hook’s weight rating before use. Heavy bags can pull light-duty hooks from the wall or damage the rail. A warm wood finish paired with black or brass hooks also suits entryway hooks and storage solutions.
Which DIY Project Fits Your Budget?
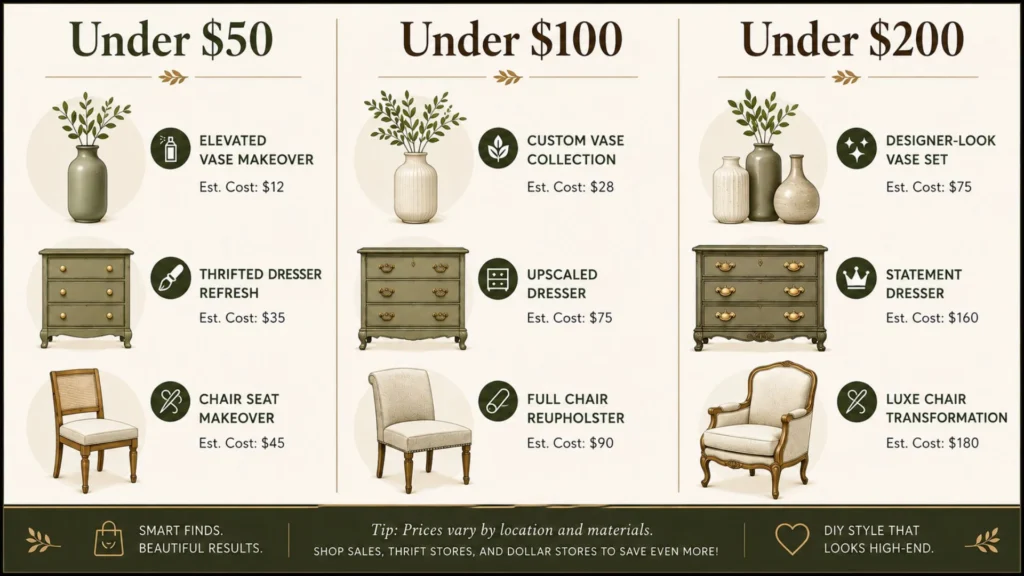
The right DIY project depends on more than the supply price. Consider your available time, the tools you already own, and whether you need a renter-safe update. A clear spending limit helps you choose a project you can finish well instead of buying materials for several unfinished ideas. It also makes it easier to compare home decorating ideas before shopping.
Start With a Small Budget
With $10 to $25, choose a quick styling update that uses inexpensive materials. Dollar-store vases, thrifted books, painted frames, and a styled coffee table can create a polished display without special tools. Focus on one finish, such as matte black, warm white, or aged brass, so the pieces look collected rather than mismatched.
Paint is another strong choice. Acrylic paint can refresh a small tray, frame, or plant pot, while painter’s tape creates clean borders or simple geometric patterns. Test the color on a hidden area, and prepare the surface before painting. Paint, thrifted frames, and dollar-store finds are budget friendly ways to update items you already own. For more budget home decor ideas, prioritize projects that improve what you already have.
Choose a Mid-Range Weekend Project
A budget of $30 to $75 gives you more room to create visible change. Framed fabric art, a floating picture ledge, refreshed pillow covers, and simple storage solutions can all fit this range, depending on the materials and tools you need.
Before shopping, check your toolbox for sandpaper, brushes, a level, scissors, and a measuring tape. Borrowing a drill or staple gun can keep the project within budget. Renters should choose leaning art, removable panels, or lightweight decor mounted with approved strips. For additional inspiration, these budget-friendly DIY projects show how small material changes can create a custom look.
Spend More on One Statement Piece
If you have $75 to $150, put the money into one larger project instead of scattering it across small accessories. A thrifted dresser furniture makeover, reupholstered chair, large gallery wall, or detailed moulding treatment can anchor an entire room.
Measure the space first, then price every required item, including primer, hardware, finish, and replacement parts. A coffee table may be the room’s largest visible surface, so include it when comparing statement projects. Leave a small buffer for mistakes or extra supplies.
Budget rule: Buy the project that improves the room’s largest visible surface first. A well-finished wall, furniture piece, coffee table, or oversized artwork usually has more impact than several small decorations.
Budget Options
Start with paint, thrifted frames, or dollar-store vases when funds are tight. These inexpensive decor choices are easy to test, store, and revise if your first color or arrangement doesn’t work.
Frequently Asked Questions
DIY decorating becomes easier when you match each project to your budget, space, lease rules, and skill level. These quick answers can help you choose an update that looks polished without creating extra work.
What is DIY home decor?
DIY decor is decorating, making, updating, or repurposing home items yourself instead of buying everything ready-made. Projects can include paint, textiles, furniture updates, storage, lighting, and wall decor.
How do I start DIY home decor on a budget?
Choose one room, set a firm spending limit, and take inventory of items you already own. Start with paint, styling changes, or thrifted pieces, and plan to spend about $20 to $50 for a beginner-friendly update.
Is DIY home decor actually cheaper than buying decor?
DIY can cost less when you reuse materials, shop secondhand, and compare your complete supply list with the finished retail item. However, tools, failed attempts, and specialty materials can reduce the savings, so every project isn’t automatically cheaper.
What DIY home decor projects work for renters?
Removable wallpaper panels, leaning art, Command-strip gallery walls, no-sew textiles, freestanding shelves, and removable hooks work well in rentals. Check product weight limits, wall type, lease rules, and removal directions before installing anything.
What’s the cheapest way to DIY decorate a room?
Declutter and rearrange your existing furniture first, then consider paint, thrifted frames, a styled coffee table, coordinated pillow covers, grouped vases, and warm bulbs. Repeating one color and improving placement can make a room feel polished with little or no spending. These interior design styles can help you choose a consistent direction.
What if a DIY project doesn’t turn out right?
Allow finishes to cure before judging the result. Sand uneven paint, repaint with thinner coats, change the hardware, or repurpose the item for another room. A failed first attempt usually points to a preparation or material issue that you can correct.
Is Dollar Tree good for DIY home decor?
Yes, Dollar Tree can be useful for glassware, simple vases, trays, baskets, candles, and basic craft supplies. Group several pieces with the same finish for a more cohesive look, but check stability, materials, scale, and safety before using them.
How long does a typical DIY decor project take?
Small styling swaps may take 30 to 60 minutes, while painting, upholstery, or wallpaper work may take 2 to 8 hours, plus drying or curing time. Plan for measuring, surface preparation, shopping, and cleanup instead of counting only hands-on work. For more budget guidance, see these budget decorating ideas.
Conclusion
DIY home decor looks expensive when the details feel deliberate. Clean finishes, a limited color palette, useful texture, proper scale, and thoughtful styling matter more than material costs. Even dollar store finds, thrifted furniture, and cheap DIY decor can look polished when you prepare each surface and give every piece a clear place.
Choose one project that fits your available time, skill level, room, and budget. Finish it carefully before starting another, then build your space slowly with colors and textures that work together. The same principles also apply outdoors, whether you’re styling a covered front porch, painting a planter box, or updating larger outdoor living spaces. This approach keeps DIY home decorating projects manageable and helps your home feel personal instead of crowded.
Pro Tip: Photograph the room before and after each update, especially changes to a large visible surface such as a coffee table. The comparison makes small improvements easier to see and helps you decide what the space still needs. If you want a seasonal project to try next, these DIY Halloween decor ideas use a thrifted frame, a can of black paint and one free weekend.
For more practical decorating inspiration on a budget, sign up for the House Decor Ideas newsletter to get the free decor guide and new weekend decorating ideas delivered to your inbox.